ChatGPT君と協力してエラーを乗り越えてプログラムを作る
概要
仕事でPythonのScrapyを使うことになりそうなので、スクレイピングのプログラムを作ってみることにした。
せっかくだから、凄腕エンジニアのChatGPT君に相談しながらScrapyの使い方を勉強した。
ChatGPT
アカウント登録しよう!!
早速プログラムの作成を依頼する
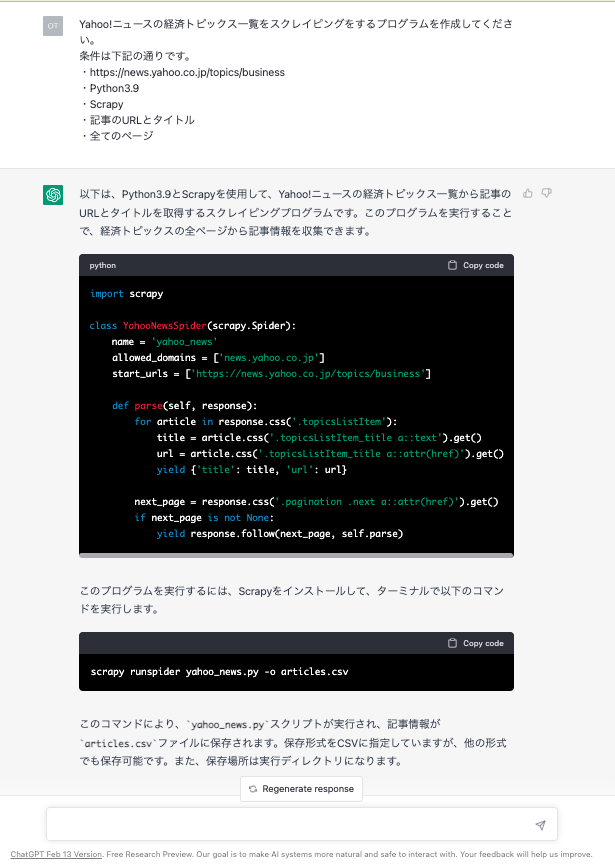
プロンプト
Yahoo!ニュースの経済トピックス一覧をスクレイピングをするプログラムを作成してください。
条件は下記の通りです。
・https://news.yahoo.co.jp/topics/business
・Python 3.9
・Scrapy
・記事のURLとタイトル
・全てのページ
回答
import scrapy

class YahooNewsSpider(scrapy.Spider):
    name = 'yahoo_news'
    allowed_domains = ['news.yahoo.co.jp']
    start_urls = ['https://news.yahoo.co.jp/topics/business']

    def parse(self, response):
        for article in response.css('.topicsListItem'):
            title = article.css('.topicsListItem_title a::text').get()
            url = article.css('.topicsListItem_title a::attr(href)').get()
            yield {'title': title, 'url': url}

        next_page = response.css('.pagination .next a::attr(href)').get()
        if next_page is not None:
            yield response.follow(next_page, self.parse)
手直し
少し間違っている箇所があるので、そこは直接手作業で直します。
- .topicListItem → .newsFeed_item
- .topicListItem_title a::text → .newFeed_item_title::text
- .topicListItem_title a::attr(href) → .newsFeed_item_link::attr(href)
- .pagination .next a::attr(href) → .pagination_item-next a::attr(href)
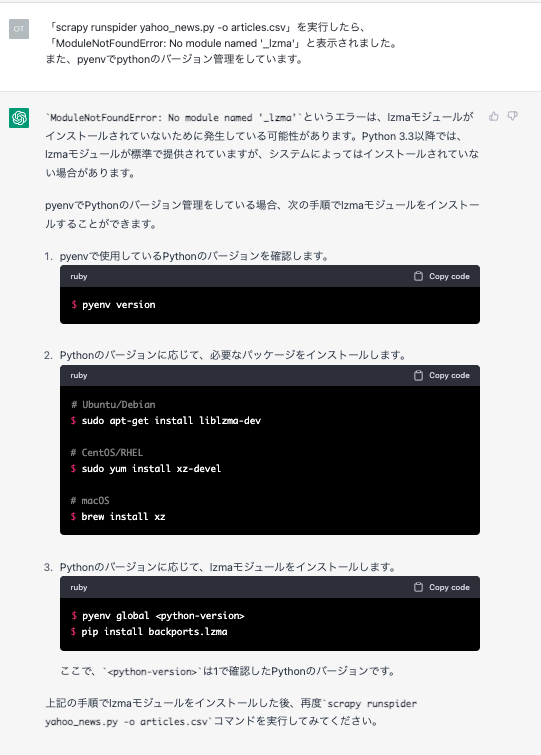
エラーが発生した
scrapy runspider yahoo_news.py -o articles.csvを実行したらエラーとなってしまった。
エラーの解決もChatGPT君に相談しよう。
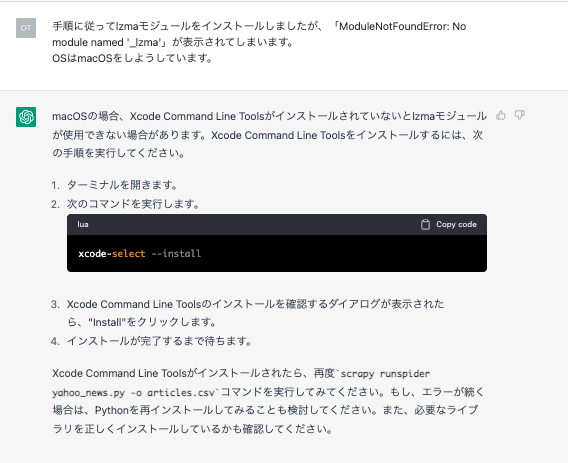
ModuleNotFoundError: No module named '_lzma'
普通に調べると、xzのインストールやpyenvでのpython再インストールで解決する事案が多いらしい。
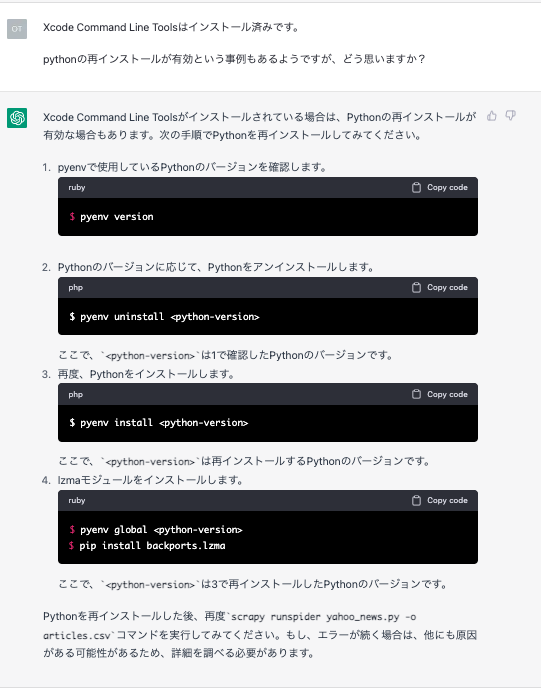
これで解決することができました。
スクレイピング結果
Yahoo!ニュース経済トピックの全記事61件のデータを取得することができました!!
「,」は広告でタイトルとかは無いのでコンマになっているようです。
また、scrapy runspider yahoo_news.py -o articles.csvによるファイルへの書き出しは、上書きではなく行が追加されていく仕様でした。
title,url
ぬいぐるみに変化 楽しむ大人増,https://news.yahoo.co.jp/pickup/6455274
宿泊客が悪意の口コミ 現場の苦悩,https://news.yahoo.co.jp/pickup/6455267
訪日客増 タクシー捕まらない問題,https://news.yahoo.co.jp/pickup/6455259
日米韓台 半導体巡り協議していた,https://news.yahoo.co.jp/pickup/6455255
ミキハウス好調 24万円の子供服も,https://news.yahoo.co.jp/pickup/6455252
,
外国クルーズ来航 コロナ前水準へ,https://news.yahoo.co.jp/pickup/6455218
路線バスの「最前席封鎖」今後は,https://news.yahoo.co.jp/pickup/6455191
混乱招く?根付かない「Rサイズ」,https://news.yahoo.co.jp/pickup/6455149
「ロシア産キャビア」神話と虚像,https://news.yahoo.co.jp/pickup/6455147
ランドセル高額化 サブスクに商機,https://news.yahoo.co.jp/pickup/6455145
,
卵メニュー相次ぎ停止 外食悲鳴,https://news.yahoo.co.jp/pickup/6455143
卵メニュー販売停止 異変いつまで,https://news.yahoo.co.jp/pickup/6455134
需要鈍化でコロナ後模索  米製薬,https://news.yahoo.co.jp/pickup/6455128
インボイス制度 声優から反対の声,https://news.yahoo.co.jp/pickup/6455098
JAL便Uターン 空港「門限」とは,https://news.yahoo.co.jp/pickup/6455063
,
のぞみグリーン車2席使用 販売へ,https://news.yahoo.co.jp/pickup/6455043
電通G社長 談合の法人責任認める,https://news.yahoo.co.jp/pickup/6455042
NHK 郵便法違反で再び行政指導,https://news.yahoo.co.jp/pickup/6455033
「黒い吉野家」メニューにも戦略,https://news.yahoo.co.jp/pickup/6455026
電力大手5社の4月値上げ 先送りへ,https://news.yahoo.co.jp/pickup/6455000
,
いすゞ 3車種11.8万台をリコール,https://news.yahoo.co.jp/pickup/6454998
国内の広告費 15年ぶり最高更新,https://news.yahoo.co.jp/pickup/6454994
湯の交換年2回だけ 旅館認め謝罪,https://news.yahoo.co.jp/pickup/6454988
関西電力 4月末まで営業活動自粛,https://news.yahoo.co.jp/pickup/6454987
「かっぱ寿司」運営側が無罪主張,https://news.yahoo.co.jp/pickup/6454977
新たな迷惑動画 スシロー側対処へ,https://news.yahoo.co.jp/pickup/6454975
フジテック 社外取締役3人解任,https://news.yahoo.co.jp/pickup/6454971
電力値上げ 首相が厳格査定を指示,https://news.yahoo.co.jp/pickup/6454958
植田氏「日銀の金融政策は適切」,https://news.yahoo.co.jp/pickup/6454957
1月の消費者物価 41年ぶり上げ幅,https://news.yahoo.co.jp/pickup/6454944
,
シャンシャン 経済効果600億円か,https://news.yahoo.co.jp/pickup/6454940
米大統領 世銀総裁にバンガ氏指名,https://news.yahoo.co.jp/pickup/6454935
ワークマン アパレルに本格参入へ,https://news.yahoo.co.jp/pickup/6454892
超電導リニア 米国でJR東海がPR,https://news.yahoo.co.jp/pickup/6454890
トラック事故死 業界の問題と対策,https://news.yahoo.co.jp/pickup/6454875
,
携帯は強制解約 通信困窮者の困難,https://news.yahoo.co.jp/pickup/6454870
「住みたい街」都心回帰の流れ,https://news.yahoo.co.jp/pickup/6454853
みずほ銀 初任給5.5万円上げ方針,https://news.yahoo.co.jp/pickup/6454837
年末の東海道新幹線停電 原因発表,https://news.yahoo.co.jp/pickup/6454834
五輪談合 電通・博報堂など立件へ,https://news.yahoo.co.jp/pickup/6454809
,
イワシ豊漁 1匹10円で売る店も,https://news.yahoo.co.jp/pickup/6454797
ホンダがベア1万円超の満額回答,https://news.yahoo.co.jp/pickup/6454801
つくばエクスプレス レール破断か,https://news.yahoo.co.jp/pickup/6454795
ロッテリア買収 ゼンショーの狙い,https://news.yahoo.co.jp/pickup/6454776
盗まれた高級車どこに 追った男性,https://news.yahoo.co.jp/pickup/6454766
,
ゼンショー バーガーで苦い経験も,https://news.yahoo.co.jp/pickup/6454762
トヨタ 春闘で3年連続の満額回答,https://news.yahoo.co.jp/pickup/6454759
カレンダーに昭和98年 なぜ併記,https://news.yahoo.co.jp/pickup/6454753
春闘 トヨタが初交渉で満額回答,https://news.yahoo.co.jp/pickup/6454754
賃上げ表明続々 人材確保に危機感,https://news.yahoo.co.jp/pickup/6454741
米マッキンゼー 約2000人を削減へ,https://news.yahoo.co.jp/pickup/6454724
加熱式メビウス値下げへ 500円に,https://news.yahoo.co.jp/pickup/6454704
関電に法令順守の緊急指示 経産省,https://news.yahoo.co.jp/pickup/6454690
FOREVER21が再上陸 脱ファスト,https://news.yahoo.co.jp/pickup/6454685
国際郵便「航空書簡」9月末に終了,https://news.yahoo.co.jp/pickup/6454682
長期金利0.505%に 変動幅上限超え,https://news.yahoo.co.jp/pickup/6454670
放置多数? 空港の駐車場どう対応,https://news.yahoo.co.jp/pickup/6454657
マルハニチロ 4月にサバ缶値上げ,https://news.yahoo.co.jp/pickup/6454645
高年収層 税負担と「子育て罰」,https://news.yahoo.co.jp/pickup/6454644
迷惑動画 どうなる回転すし文化,https://news.yahoo.co.jp/pickup/6454629
賃上げでも人手不足「年収の壁」,https://news.yahoo.co.jp/pickup/6454623
SSRでreact-quillを使うときの対応(Next.js)
とりあえず使えればいい
何も考えずにNext.jsでreact-quillを使うとこうなる。
$ npm install --save-dev react-quill
import { useState } from 'react'
import ReactQuill from 'react-quill'
import 'react-quill/dist/quill.snow.css'

export default function Quill() {
  const [value, setValue] = useState<string>()

  return (
    <ReactQuill
      theme="snow"
      value={value}
      onChange={(v) => setValue(v)}
    />
  )
}
これだと次のようなエラーが出る。
ReferenceError: document is not defined
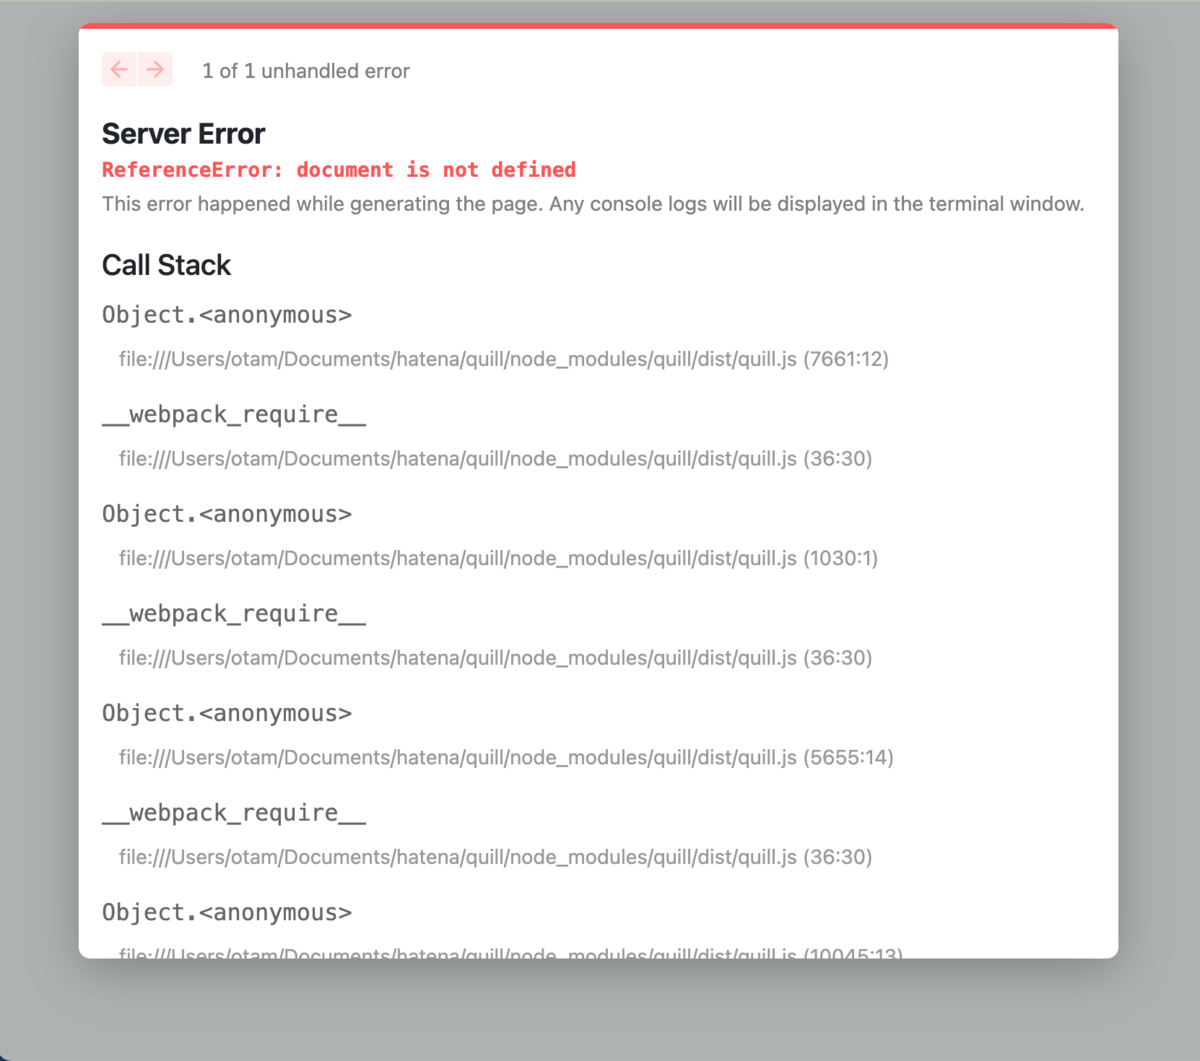
対処法はこちらを参照(1)。
importしたreact-quillの処理が働いているのだが、SSRモードでwindow.documentが生成される前なので、エラーとなってしまう。
これはnext/dynamicを利用すると解決する。next/dynamicを使うことで、importするのを画面のレンダリングまで待つことができる。
修正後はこうなる。
import dynamic from 'next/dynamic'
import { useState } from 'react'
import 'react-quill/dist/quill.snow.css'

const ReactQuill = dynamic(() => import('react-quill'), { ssr: false })

export default function Quill() {
  const [value, setValue] = useState<string>()

  return (
    <ReactQuill
      theme="snow"
      value={value}
      onChange={(v) => setValue(v)}
    />
  )
}
react-quillを使うだけであれば、ここまでで十分。

ReactQuillインスタンスへのアクセス
ここからは、文字数カウントなどをするためにReactQuillインスタンスへのアクセスを行うための対応。
import dynamic from 'next/dynamic'
import { useMemo, useRef, useState } from 'react'
import 'react-quill/dist/quill.snow.css'

const ReactQuill = dynamic(() => import('react-quill'), { ssr: false })

export default function Quill() {
  const [value, setValue] = useState<string>()
  const quillRef = useRef<any>() // 本当はuseRef<ReactQuill>にしたいけど、dynamic importしているのでanyにするしかなさそう

  // 文字数をカウントしたい
  const strCount = useMemo(() => {
    if (!quillRef.current) return

    const editor = quillRef.current.getEditor()
    const unprivilegedEditor = quillRef.current.makeUnprivilegedEditor(editor)
    return unprivilegedEditor.getLength() - 1
  }, [value])

  return (
    <>
      <ReactQuill
        ref={ref}
        theme="snow"
        value={value}
        onChange={(v) => setValue(v)}
      />
      <p>文字数:{strCount}</p>
    </>
  )
}
これだと次のようなエラーが出るので、続けて対応していく。
Property 'ref' does not exist on type 'IntrinsicAttributes & ReactQuillProps'
これについては、こちらが一番詳しかったので参照。(3)
dynamic importするときに、refを設定できるようにReactQuillPropsを継承してinterfaceを作成してあげるとできた。
import dynamic from 'next/dynamic'
import { useMemo, useRef, useState } from 'react'
import { ReactQuillProps } from 'react-quill'
import 'react-quill/dist/quill.snow.css'

const ReactQuill = dynamic(
  async () => {
    const { default: RQ } = await import('react-quill')
    interface Props extends ReactQuillProps {
      forwardedRef: any
    }
    return (props: Props) => <RQ ref={props.forwardedRef} {...props} />
  },
  { ssr: false }
)

export default function Quill() {
  const [value, setValue] = useState<string>()
  const quillRef = useRef<any>() // 本当はuseRef<ReactQuill>にしたいけど、dynamic importしているのでanyにするしかなさそう

  // 文字数をカウントしたい
  const strCount = useMemo(() => {
    if (!quillRef.current) return

    const editor = quillRef.current.getEditor()
    const unprivilegedEditor = quillRef.current.makeUnprivilegedEditor(editor)
    return unprivilegedEditor.getLength() - 1
  }, [value])

  return (
    <>
      <ReactQuill
        forwardedRef={quillRef}
        theme="snow"
        value={value}
        onChange={(v) => setValue(v)}
      />
      <p>文字数:{strCount}</p>
    </>
  )
}

gitの差分はこちら
https://github.com/di-kotobuki/react-quill/commit/e417f36449b57ae7867fd8a8f634a64e43ff4455
参照
【Kali Linux】aircrack-ngを使ってみる
- 概要
- チュートリアルの手順
- 1. Start the wireless interface in monitor mode
- 2. Start airodump-ng to collect authentication handshake
- 3. Use aireplay-ng to deauthenticate the wireless client
- 4. Run aircrack-ng to crack the pre-shared key
- 終わったら
- 参考
概要
以前インストールしたkali-tools-top10に含まれる「aircrack-ng」を使ってみる。
aircrack-ngでやれることはこちら。
- Monitoring: Packet capture and export of data to text files for further processing by third party tools
- Attacking: Replay attacks, deauthentication, fake access points and others via packet injection
- Testing: Checking WiFi cards and driver capabilities (capture and injection)
- Cracking: WEP and WPA PSK (WPA 1 and 2)
(パケット監視、反射攻撃・認証解除・偽装アクセスポイント・パケットインジェクションによるものなどの攻撃、無線LANカードとドライバーの性能チェック、WEPおよびWPA PSKの解読)
今回はパケットの監視とWPAのクラッキングで自宅のwifiルータのSSIDを当てられるかをチュートリアルに沿ってやってみる。
チュートリアルの手順
- 無線LANカードを監視モードにする
- airodump-ngを実行して対象アクセスポイントの認証ハンドシェイクを取得
- (オプションの手順なので飛ばします)
- WPAの事前共有鍵をパスワードリストを利用して解読
1. Start the wireless interface in monitor mode
1-1. 無線LANカードのインターフェース名を調べる
sudo arimon-ng

実行結果のInterface列がインターフェース名で、自身の無線LANカードは通常「wlan0」となる。
今回使用するのはwlan0。
※Driver列の末尾がphy0だと対応するaircrack-ngのバージョンに限りがあるらしい
※何も表示されない場合は、無線LANカードが監視モードに対応してないということなる。
1-2. 無線LANカードを監視モードに変更
まずは現状を確認。
iwconfig
無線でインターネットに接続しているならば、wlan0には「IEEE 802.11 ESSID "接続しているネットワーク名" ...」と表示される。
これを監視モードに変更する。(末尾の9はチャンネルの指定なのでなくても問題ないと思う。)
sudo airmon-ng start wlan0 9
再びiwconfigで確認するとwlan0は「wlan0mon」となり、「IEEE 802.11 Mode:Monitor ...」になる。
ここで、「Found 2 processes that could cause trouble. ...」と表示された場合、一応指示に従って実行したほうが良い。
sudo airmon-ng check kill
2. Start airodump-ng to collect authentication handshake
2-1. アクセスポイントのMACアドレスを確認
sudo airodump-ng wlan0mon
実行結果からESSIDが自身のwifiルーターの行を確認。
BSSIDカラムの値がMACアドレスで、CHカラムは先程指定した9になっている。
※他人のアクセスポイントに対してクラッキングすることは犯罪なので、BSSIDは間違えないよう確実に自身のものを使用する。
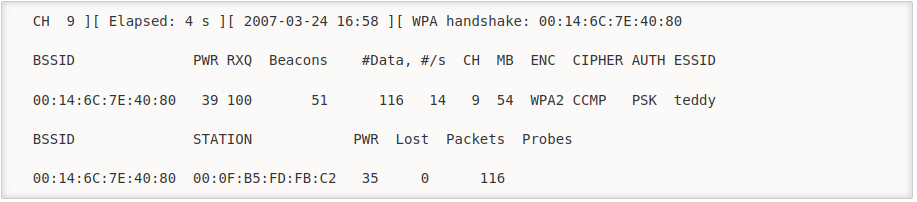
2-2. 対象のアクセスポイントを監視して、4-way認証ハンドシェイクを取得
sudo airodump-ng -c 9 --bssid 11:22:33:44:55:66 -w ./psk wlan0mon
sudo airodump-ng -c <チャンネル> --bssid <MACアドレス> -w <書き出すファイル> <インターフェース名>
出力に「WPA handshake: 11:22:33:44:55:66」と表示されたら、ハンドシェイク取得に成功しているので「ctrl + c」でairodump-ngの実行を停止する。
また、psk-01.cap, psk-01.csv, psk-01.kismet.csv, psk-01.kismet.net.xml, psk-01.log.csvが生成されていることを確認する。

3. Use aireplay-ng to deauthenticate the wireless client
オプションなので飛ばします。
4. Run aircrack-ng to crack the pre-shared key
パスワード辞書を用意しておく。(例えばこれ)
sudo aircrack-ng -w ./password.lst -b 11:22:33:44:55:66 ./psk-01.cap
sudo aircrack-ng -w <パスワード辞書> -b <MACアドレス> <ハンドシェイク取得で書き出したファイル>
自宅のwifiルーターなのでSSIDは知っているから、わざとパスワード辞書からそのSSIDを削除したものと追加してもので結果がどうなるか試してみるといいかもしれない。
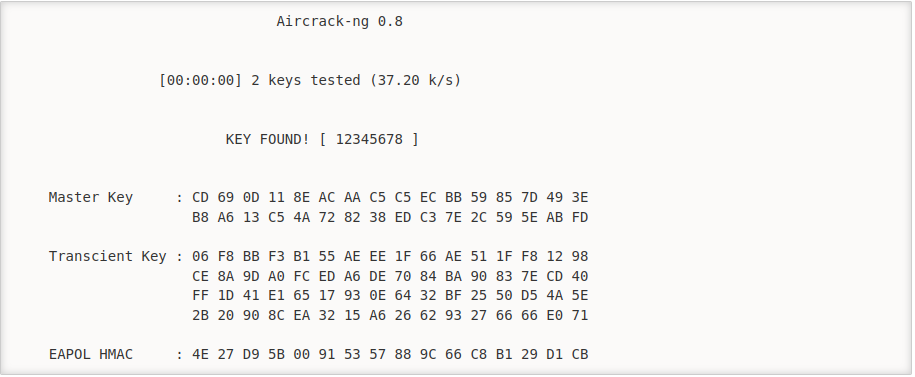
該当なしの場合は「KEY NOT FOUND」と表示される
終わったら
監視モードにしたので、ネットにはつながっていない状態となっている。
PCを再起動していつも通りネット接続できていたら元通りになっているのでおしまい。
参考
【VSCode】Debian Ubuntuでのインストール
概要
Kali LinuxにVSCodeをインストールしました。
Linuxでのインストールが初めてだったので記録しておきます。
公式の手順はこちら。
The easiest way to install Visual Studio Code for Debian/Ubuntu based distributions is to download and install the .deb package (64-bit), either through the graphical software center if it's available, or through the command line with:
インストールパッケージをダウンロード
「.db package (64-bit)」のリンクをクリックするとダウンロードできます。
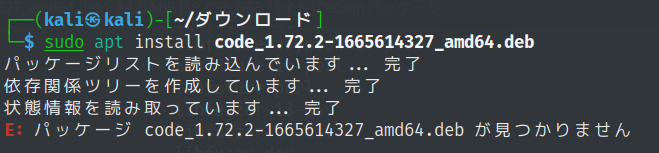
インストール
sudo apt install ./<file>.deb
注意点
パスは「./」から始めないと、パッケージが見つかりませんと言われます。

参考
【Kali Linux】nmapとhydraを使ってみる
概要
先週Kali LinuxをPCにインストールできたから今回は実際に動かしたい。
参加応募したゆるいハッキング大会の説明にnmapとhydraとあるので、これらについて調べて体験する。
kali-tools-top10
ペネトレーションテストやシステム監査に必要なツール10選で、これがあれば基本的なことはだいたいできる。
今回使うnmapとhydraも含まれている。
他にもMetapackagesと呼ばれるツールのおすすめセットがいくつもあるので見てみるといいかもしれない。
This is Kali Linux, the most advanced penetration testing and security auditing distribution.
This metapackage depends on the 10 most important application that Kali Linux provides.
https://www.kali.org/tools/kali-meta/#kali-tools-top10
インストールはこちらを実行。
sudo apt install kali-tools-top10
hydra
パスワードクラックを行うツールで、いわゆる「辞書攻撃」ができます。
仕組みは単純で、ユーザ名とパスワードのリストによる総当りです。
https://www.kali.org/tools/hydra/
下の例は192.168.1.123に対してssh接続でusername_list.txtのユーザ名とpassword_list.txtのパスワードで総当りを6スレッドで実行するというもの。
ユーザ名やパスワードを固定値にする際は、-l admin -P passwordのように直接入力すればいいです。
hydra -l username_list.txt -P password_list.txt -t 6 192.168.1.123 ssh
※他人のアカウントへ勝手にログインすることは不正アクセスになりえるのでしてはいけない。
nmap
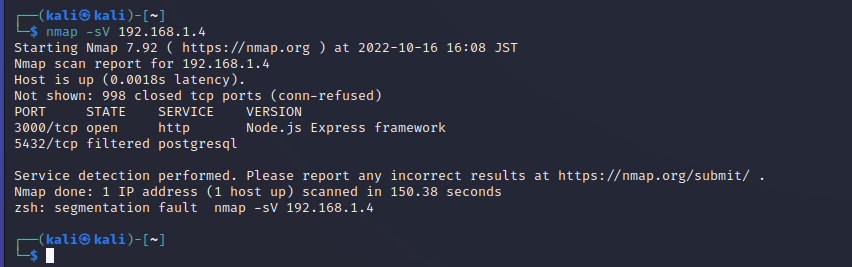
nmapを使うと、対象が使用しているport番号とそのport番号におけるプロトコル、状態、提供されているサービス、について知ることができます。
https://nmap.org/man/ja/index.html
別のPCでReact.jsで作成したアプリをローカルで起動して、Kali LinuxをインストールしたPCからnmapを実行しました。
※他人のネットワークをスキャンすることは不正アクセスになりえるのでしてはいけない。
「zsh: segmentation fault」 についてはこちらを参照
参照
【Kali Linux】Kali LinuxをUSBを使ってPCにインストールする(ついでにSSD換装とメモリ増設)
概要
最近ITの中でもセキュリティ分野に興味を持ち出して調べたところ「ゆるいハッキング大会」というオフラインイベントがあることを知った。初心者でも参加できるみたいなので参加応募した。
Kali Linux等ペネトレーション系のソフト/OSインストール済みノートPCを持参することを強く勧めているようなので、ほこりを被っていた大学生協PCにインストールする。
ついでにHDDをSSDに交換とメモリ増設をやる。元のデータは要らないのでデータを転送したりはせずに、新品のSSDにKali Linuxをインストールする。
- 概要
- SSDとメモリの付け替え
- Kali Linuxインストーラーをダウンロード
- Rufusをダウンロード
- Rufusを使ってKali Linuxインストール用のUSBを作成
- USBを使ってPCにKali Linuxをインストール
- 日本語入力
- おまけ(上手くいかなかったこと)
- 参考
SSDとメモリの付け替え
価格ドットコムで比較的安価なものを見繕う。
- メモリ
シリコンパワー ノートPC用メモリ 1.35V(低電圧)
DDR3L 1600 PC3L-12800 8GB 204Pin Mac対応 SP008GLSTU160N02
3090円 - SSD
CFD CG4VX SATA接続 2.5型SSD 480GB CSSD-S6B480CG4VX
5399円
その他必要なものは、8GBの空っぽなUSB、ねじを開けるためのドライバー。
使ったPCは2014年に購入した富士通製で、品名「LIFEBOOK SH90/P」、型番「RMVS90PRD1」。
取付け作業
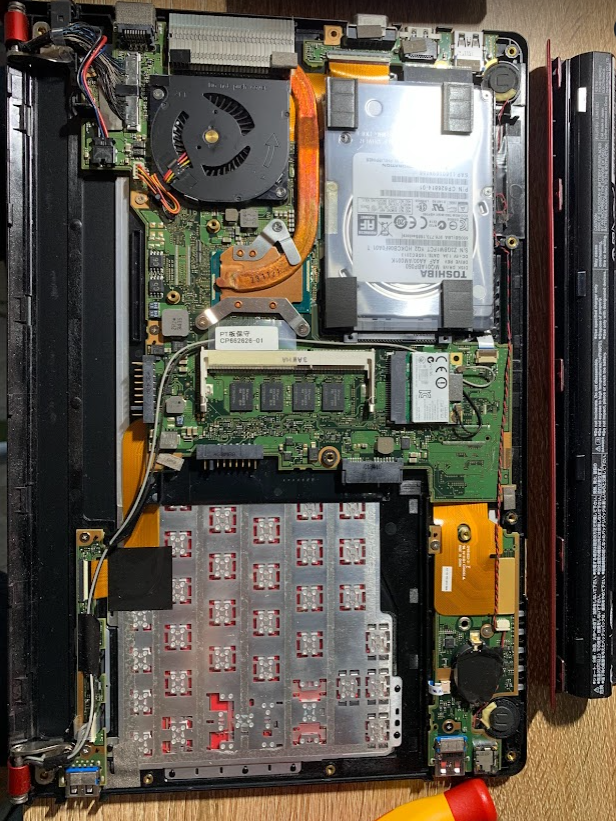
右上にSSD
真ん中にメモリ

ピンがあるので上手く差し込む
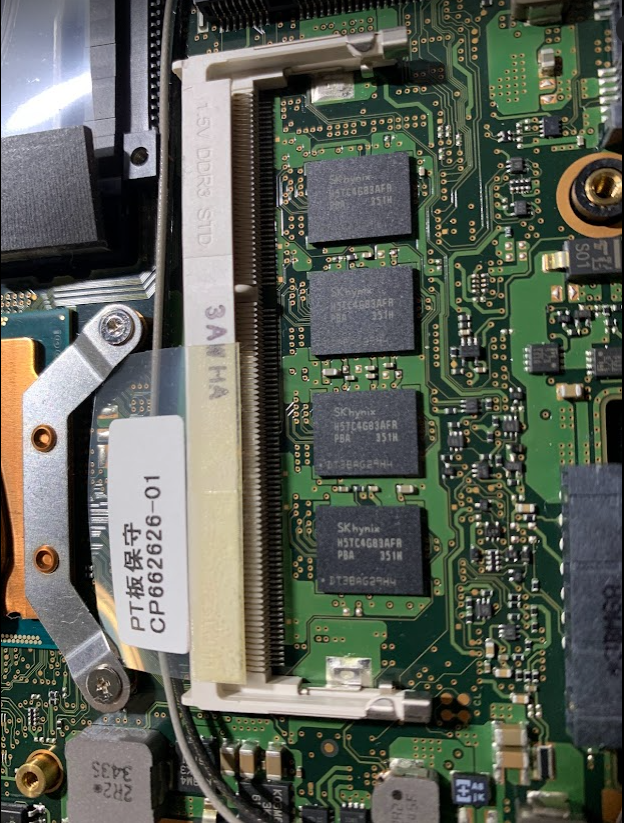
そしたら、上から水平になるように押し込むとピッタリはまる。
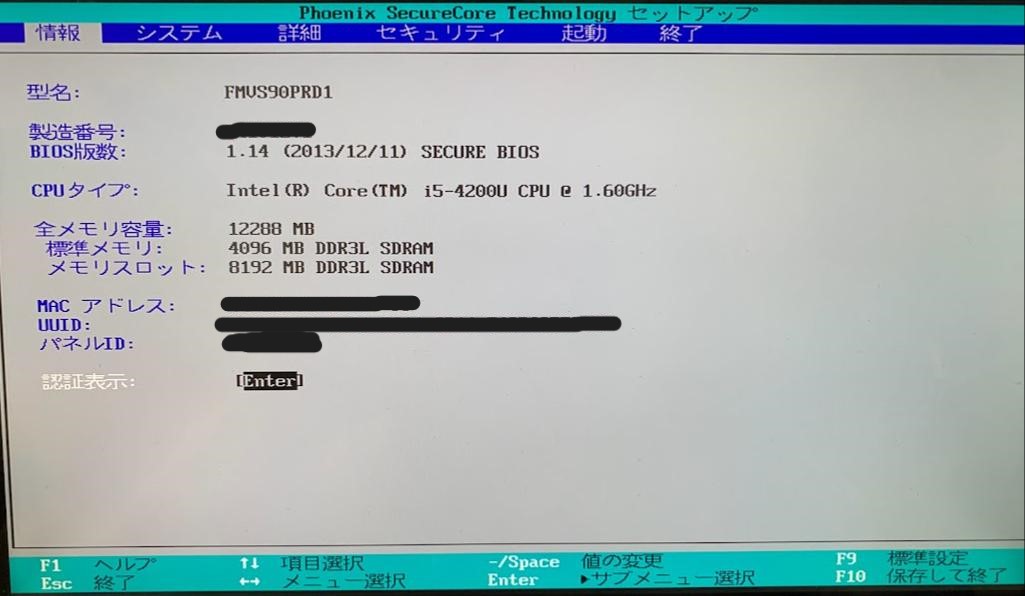
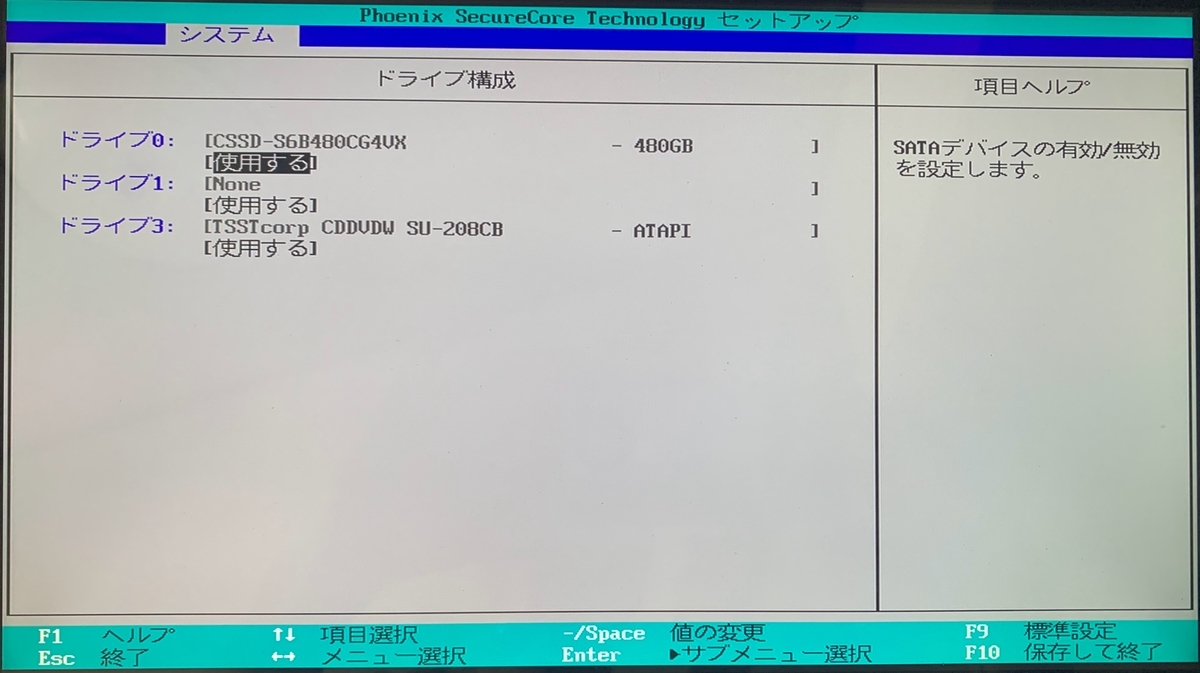
確認
PC起動時にF2キー連打でBIOS画面を表示。
メモリスロットに追加した8GBのメモリが認識されている。
ドライブ0には換装したSSDが認識されている。(後のKali Linuxインストール時にドライブ選択する場面があるので名前を覚えておく)
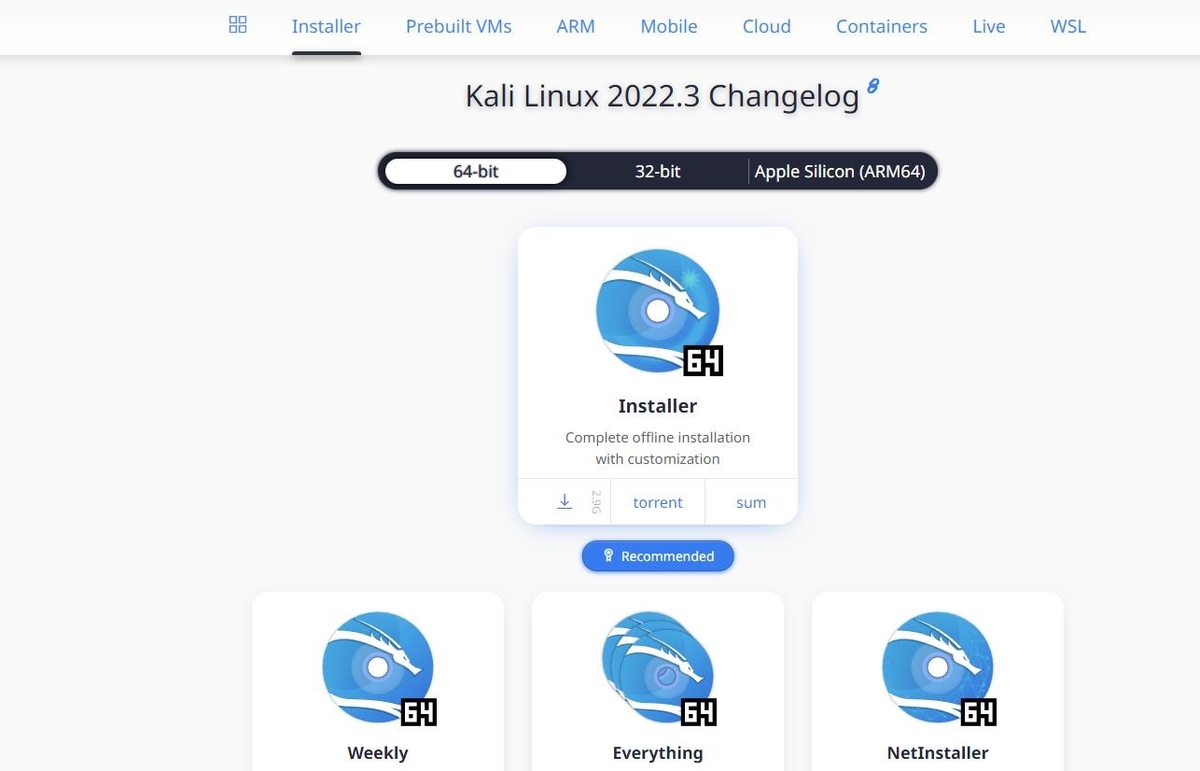
Kali Linuxインストーラーをダウンロード
公式サイトにアクセスして少し下にスクロールすると、Installer Imagesが出てくる。
Recommendedのラベルがついているものをダウンロードできるのが一番いい。
ただ、実際には時間がかかりすぎて上手くいかないので、「torrent」をクリックしてtorrentファイルをダウンロードする。
※Recommendのやつは容量は3GB弱ですが、isoファイルのダウンロードにはサーバー側での準備処理が必要だったりするらしく、かなり時間がかかるらしいです。ミラーサイトでもかなりダウンロードに時間がかかるらしいのでtorrentを利用した方が良いです。
https://www.kali.org/get-kali/#kali-installer-images
torrentファイル
ダウンロードするときにtorrentの部分をクリックすると「kali-linux-2022.3-installer-amd64.iso.torrent」というtorrentファイルになる。
簡単に言うと、isoファイルをダウンロードするための情報が詰まったファイルで、torrentを使う方が早くisoをダウンロードすることができる。
※torrentファイルは危険なことも多いようなので、出所不明なtorrentファイルには触れないように注意が必要。
torrentファイルを利用してお目当てのisoファイルをダウンロードするにはBitTorrentを使用する。
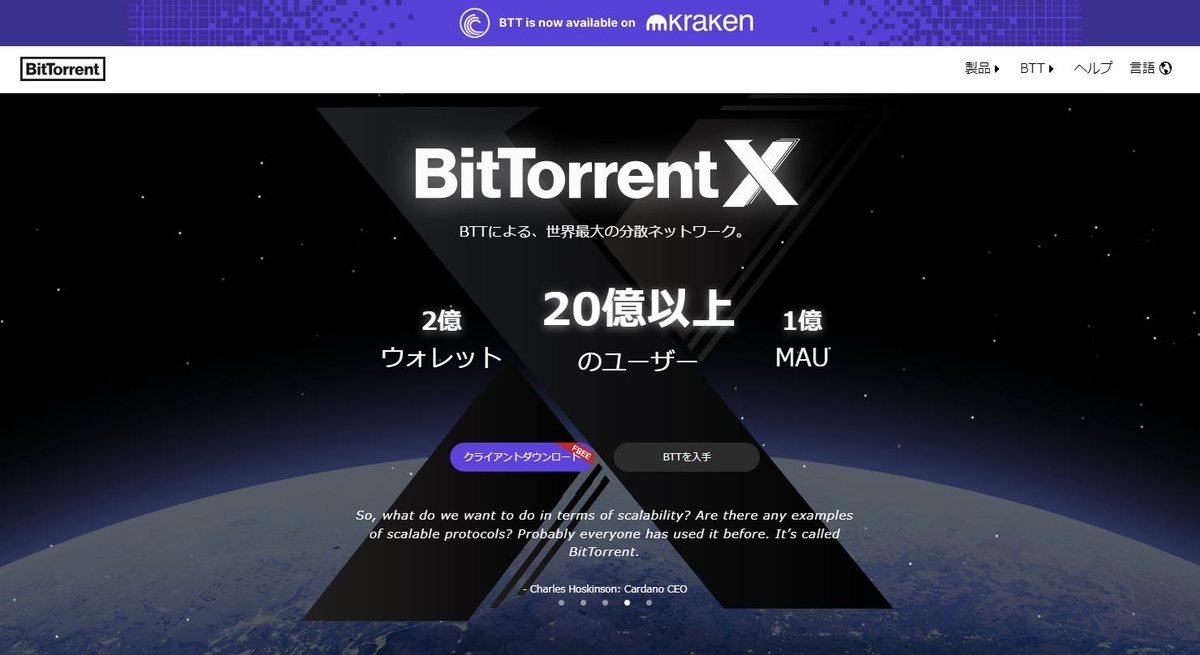
BitTorrent
「クライアントダウンロード」→BitTorrent Webの「無料ダウンロード」→無料の「今すぐダウンロード」の順に進むとインストーラーをダウンロードできる。
今回以外にも使う予定があるならClassicでもいいかもしれない。
インストーラーを起動するとWindowsセキュリティに結構怒られますが、設定から許可して動かします。
後は手順に従ってインストールを行いますが、途中MacAfeeとOperaのインストールを勧めくるので、しっかりチェックボックスは外して回避しましょう。
仕組みについてはこちらを参考
https://www.bittorrent.com/ja/
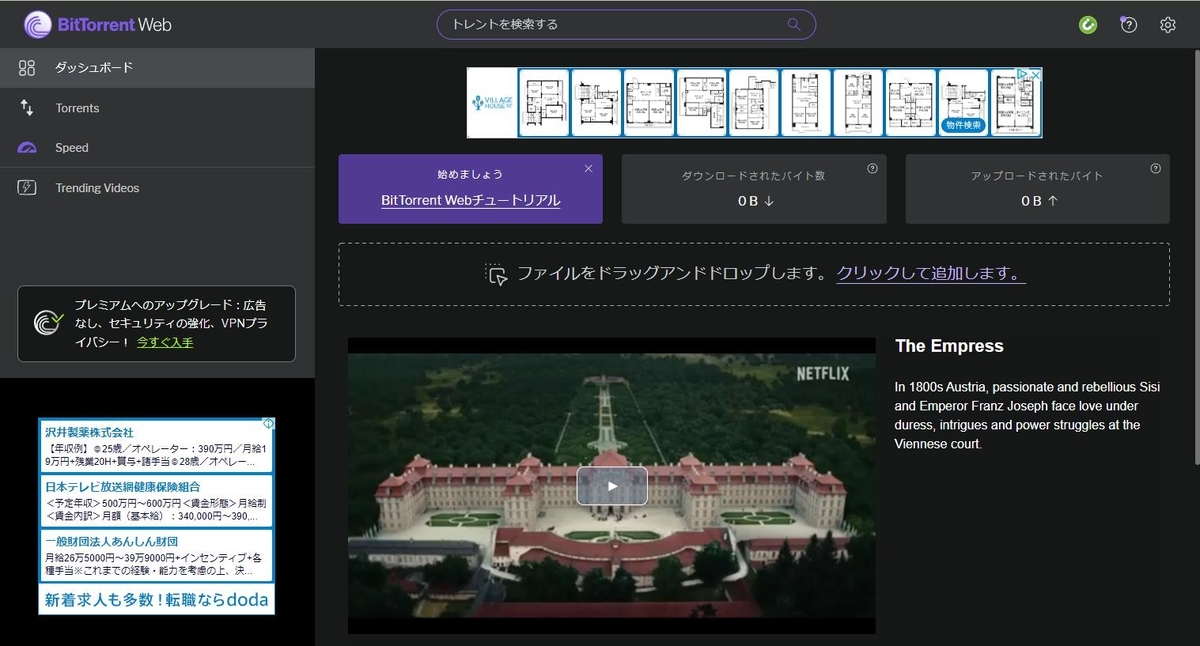
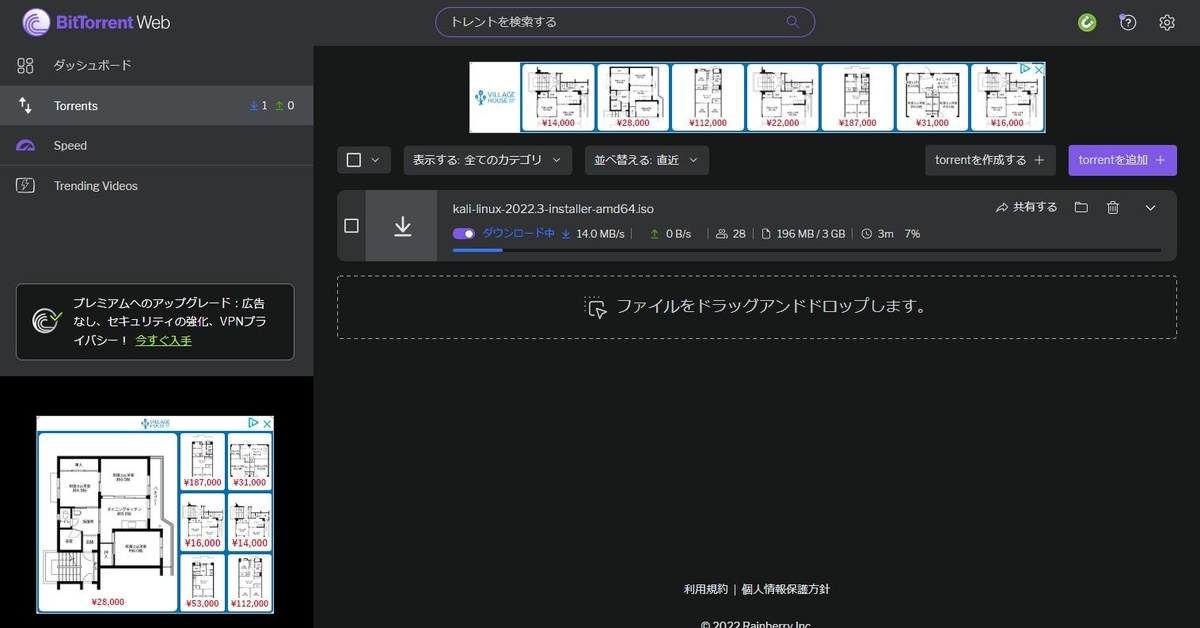
isoファイル
BitTorrentのインストールが終わると自動的にブラウザ上で立ち上がります。
Kali Linuxのtorrentファイルをドラッグアンドドロップすると、お目当てのisoファイルのダウンロードが開始されます。
5分くらいですぐ終わります。
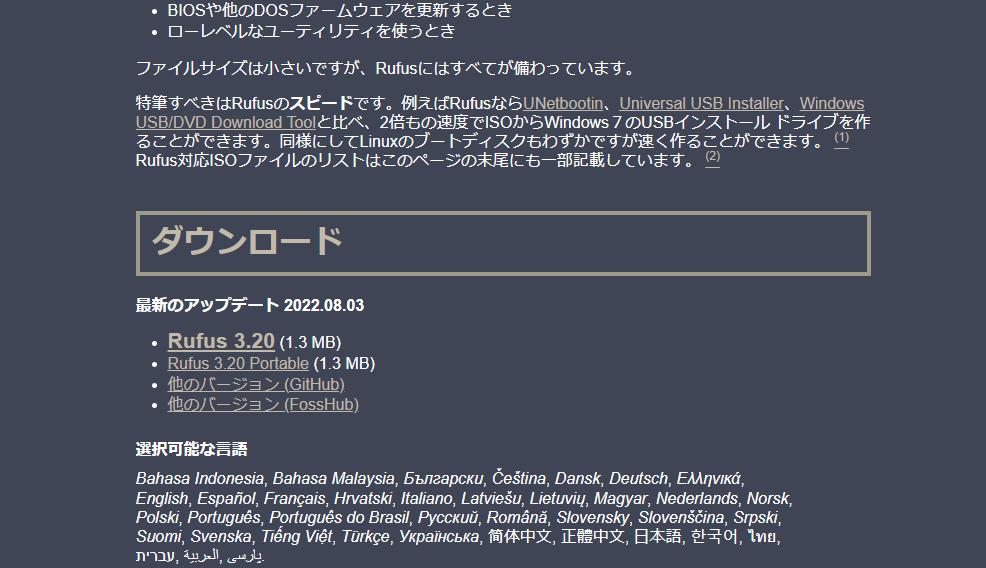
Rufusをダウンロード
「Rufus 3.20」をクリック。
rufus-3.20.exeがダウンロードされる。
Rufusを使ってKali Linuxインストール用のUSBを作成
まず、PCにUSBメモリを挿す。(USBの中身は今からの操作で全部消されます)
※必ずUSB3.0のポートに挿しましょう。USB2.0のポートに挿すと下記の操作で「イメージの抽出に失敗しました」といったエラーでほぼ確実に失敗します。(こちらを参考)
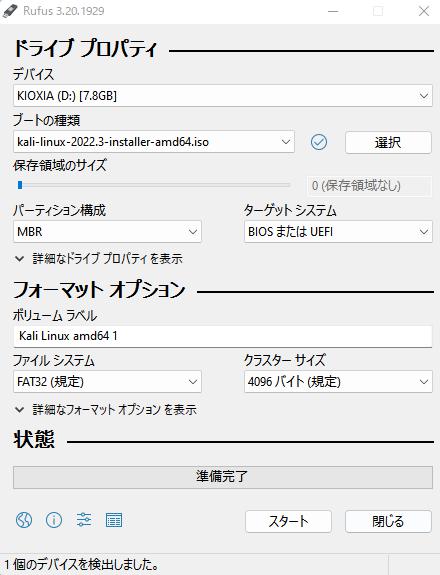
次にダウンロードしたrufus-3.20.exeを実行。
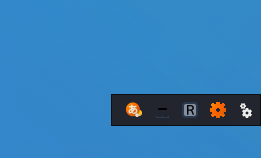
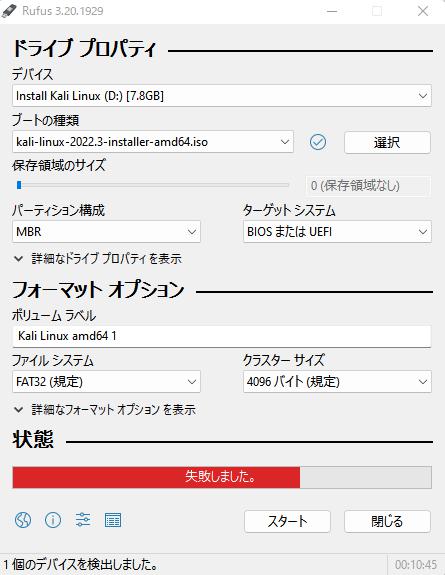
Rufusが起動したら下記の設定を行う。
「スタート」をクリック。ダイアログがいくつか表示されるがそのままOK等を選択して先へ進む。
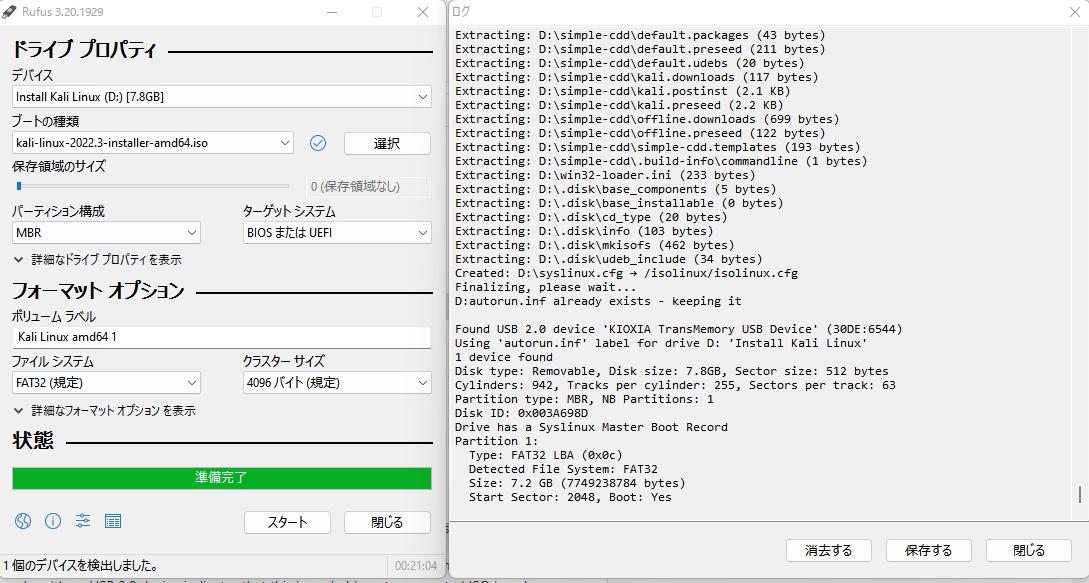
エラーとなってしまう場合に備えてログを表示しておくと良いです。
スタートボタンに左側にあるアイコンでログを表示できます。
USBを使ってPCにKali Linuxをインストール
Rufusで設定できたUSBをKali Linuxを入れたいPCに挿して起動します。
この時にBIOSを開くために「F2」キーを連打しておきます。(一回で良かった気がしますがタイミングが分からないので連打します。)
ピーっという音が鳴ればOKです。
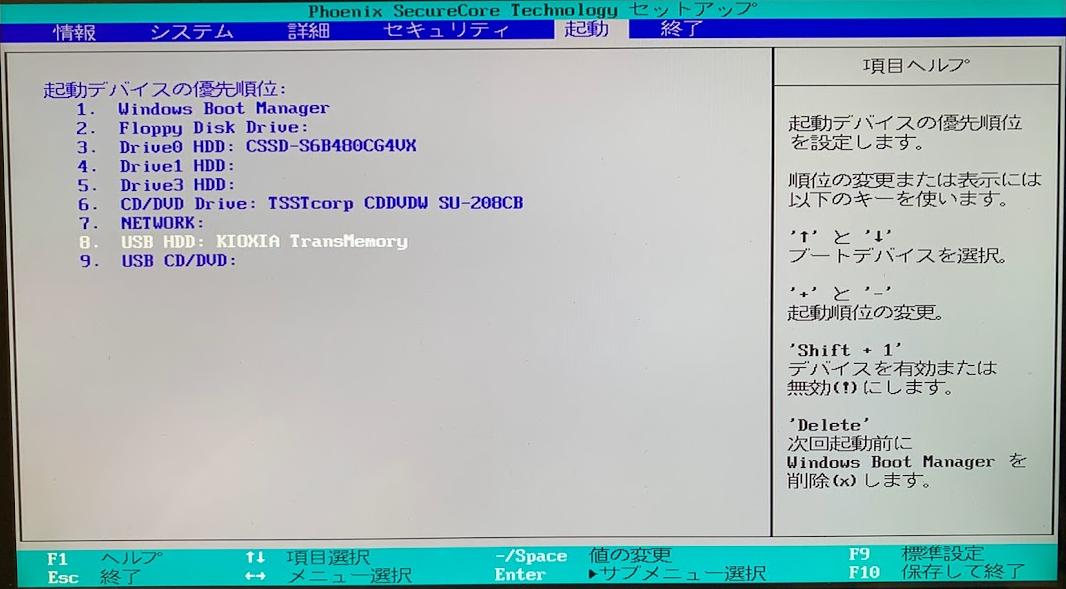
BIOS画面での設定
USBメモリでブートするように設定
ヘルプに従って起動デバイスの優先順位をUSBを一番にする。
その他のデバイスは一応無効にしておく。

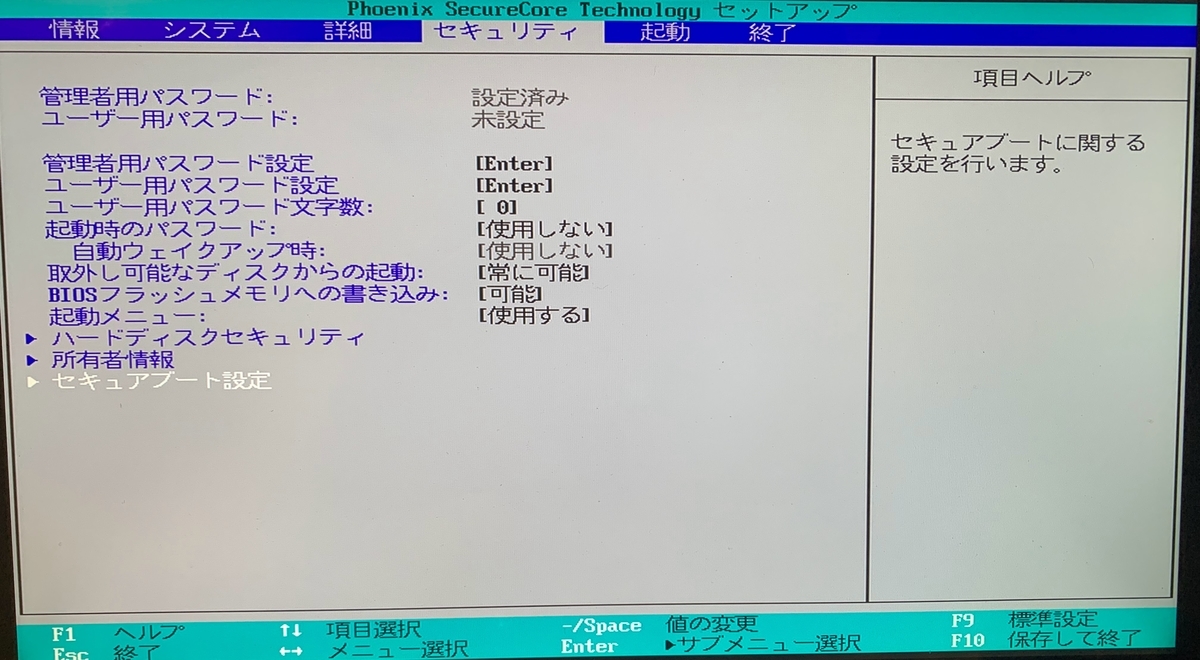
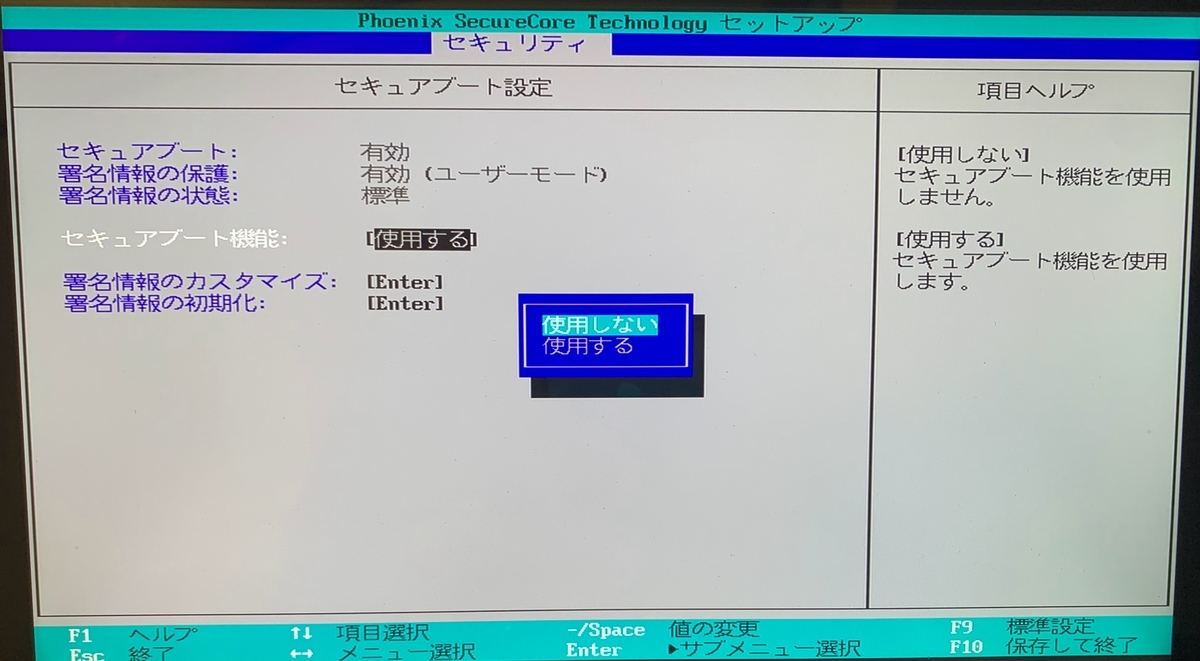
セキュアブートをしないように設定
「セキュアブート設定」→「セキュアブート機能」で使用しないに変更
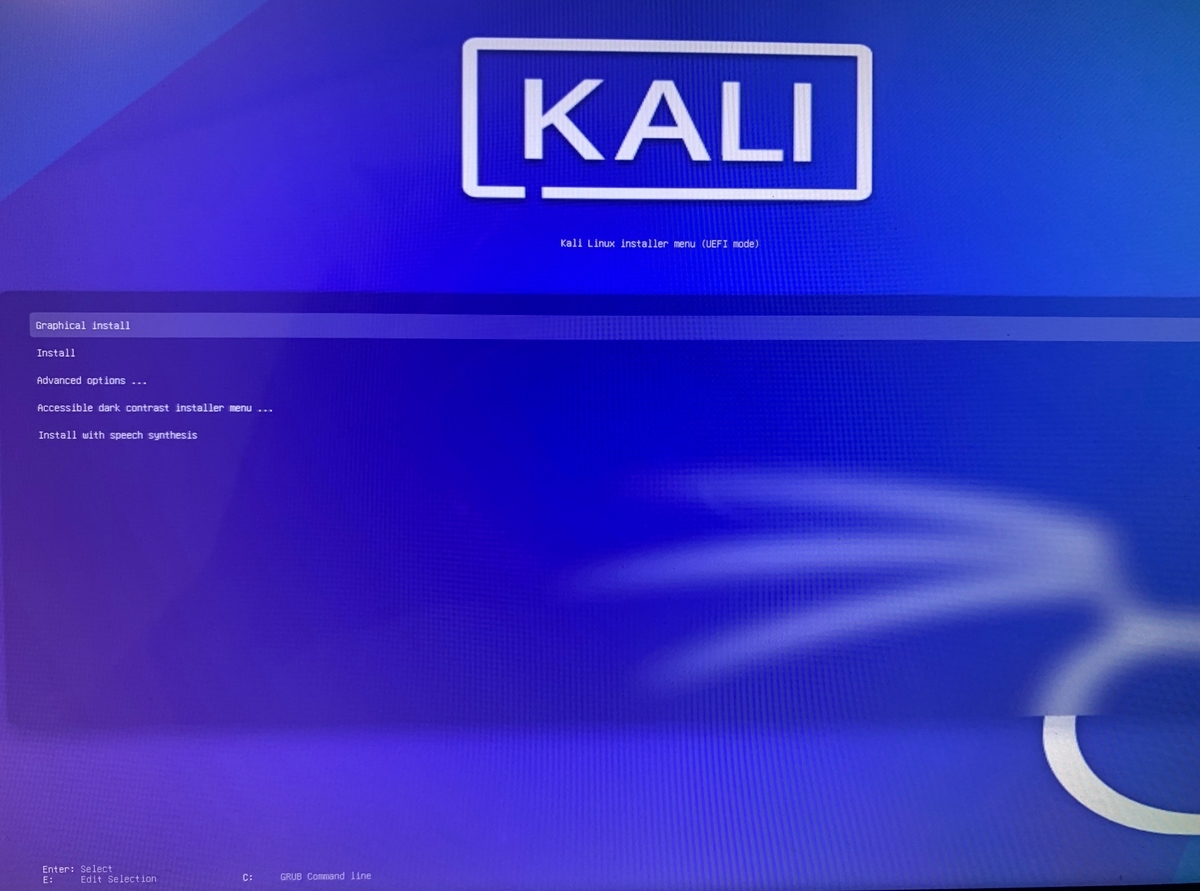
インストール作業
BIOS画面での上記設定ができたら、保存して終了する。
すると、USBメモリでブートしてくれる。
「Graphical install」でEnterを押下するとインストール作業が始まる。
※USBでKali Linuxをインストールすると結構な確率で「インストールメディアをマウントできませんでした」という内容のエラーが発生するっぽいです。対応方法としては、USBを一回抜き挿しするとUSBを認識して大丈夫になるらしいです。(こちらを参考)
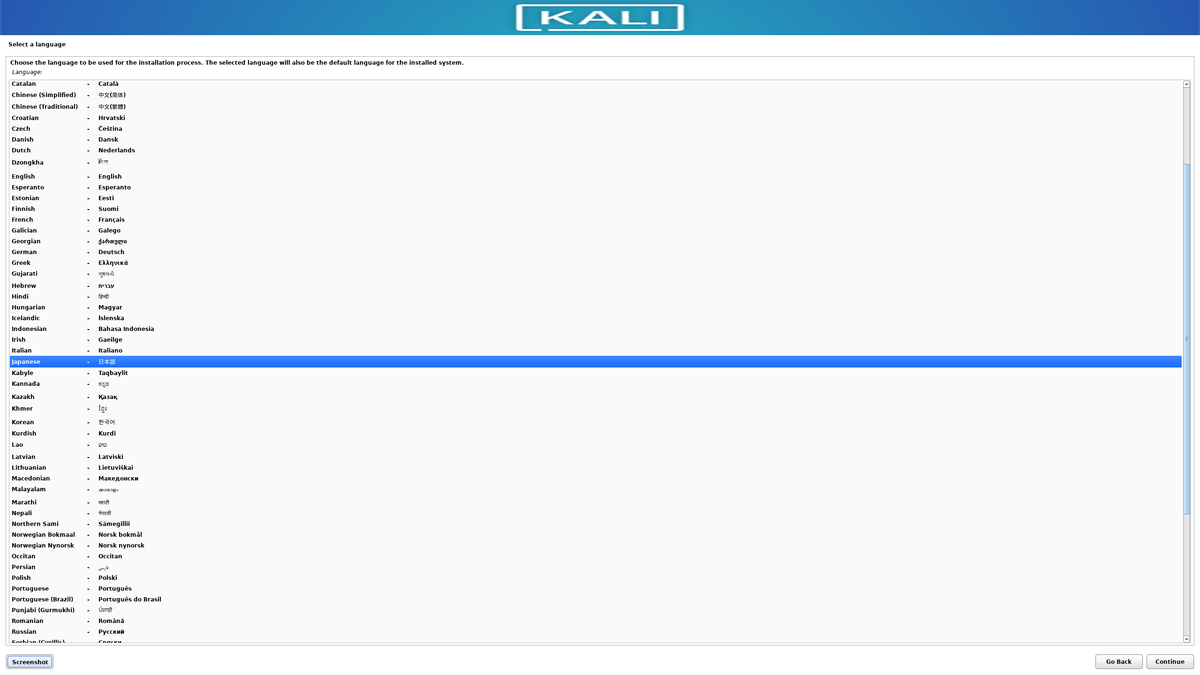
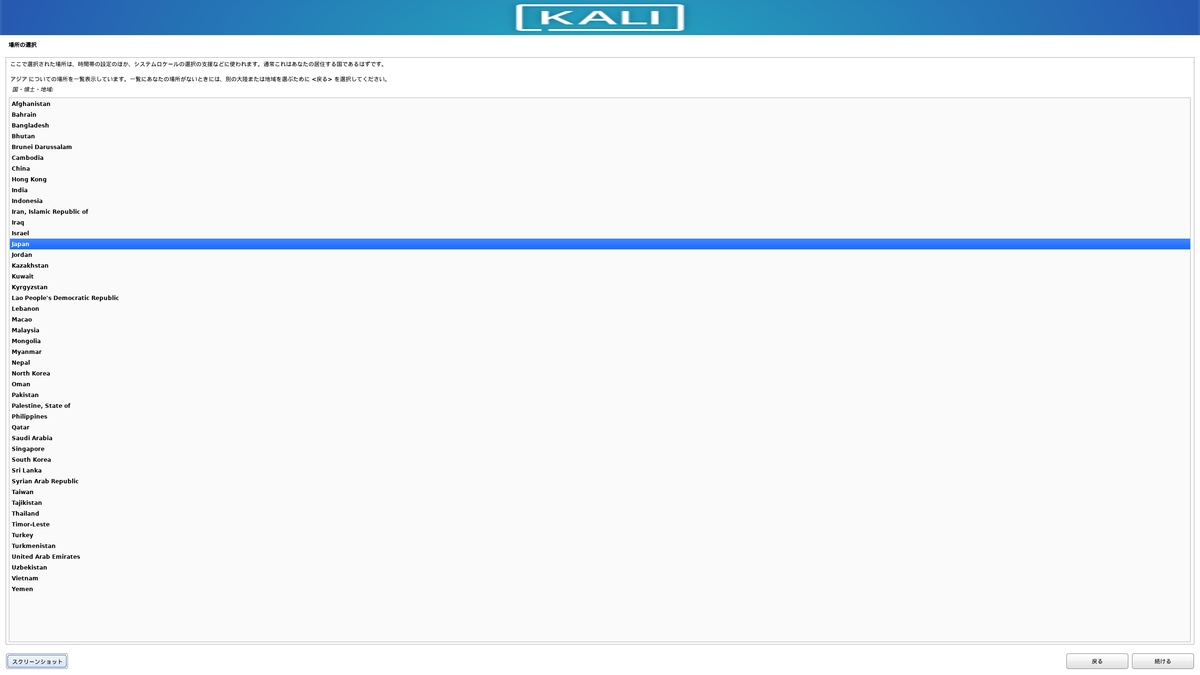
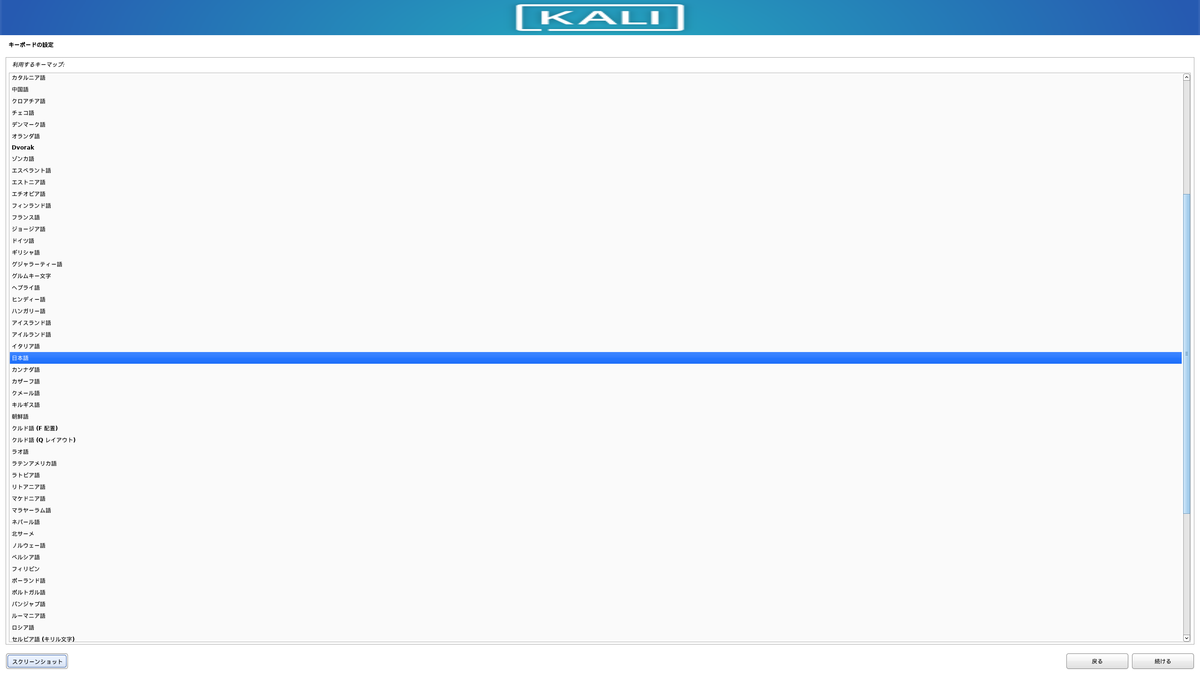
言語関連の設定
日本を選択。
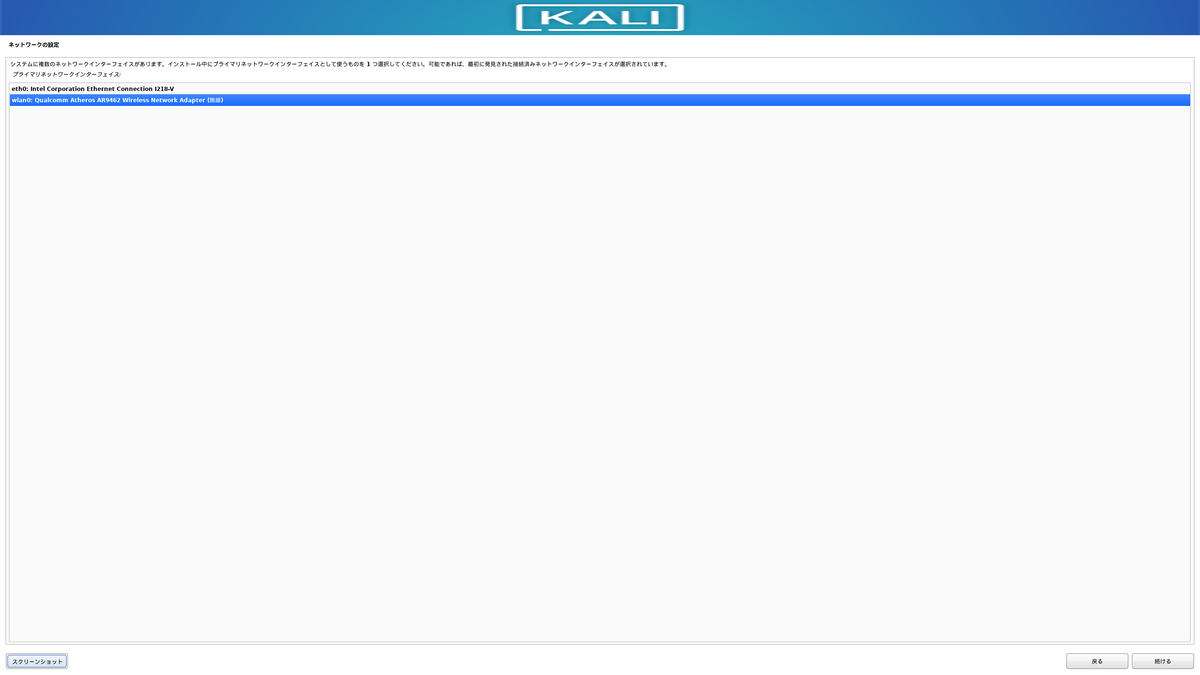
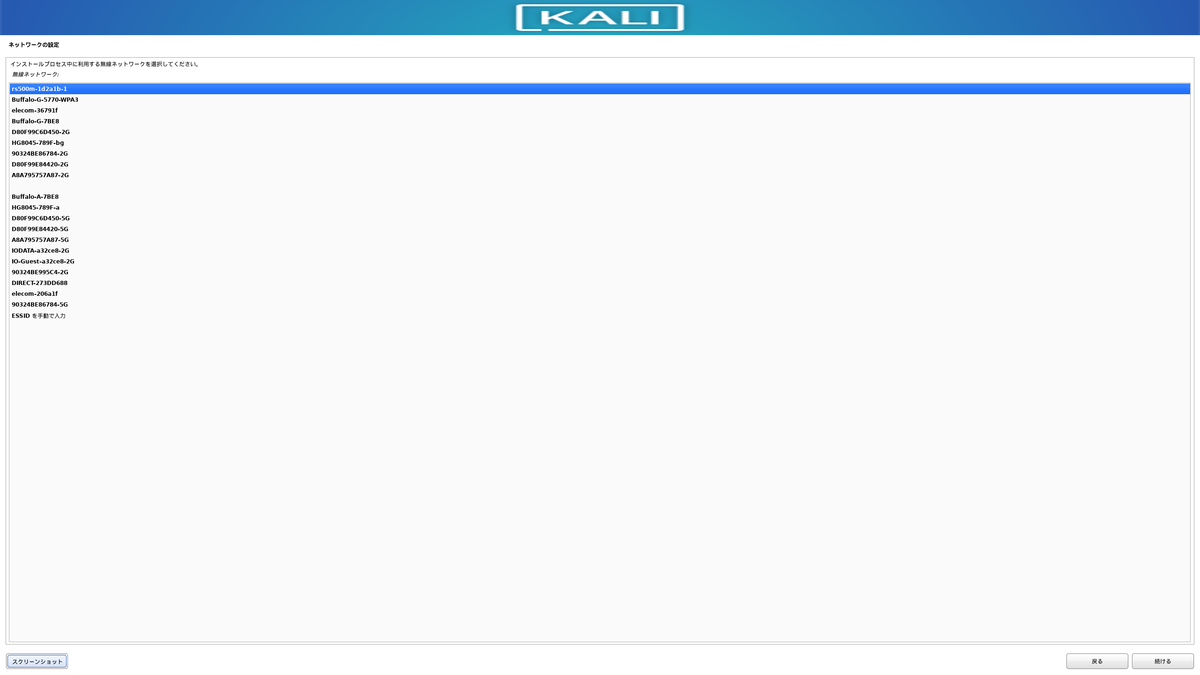
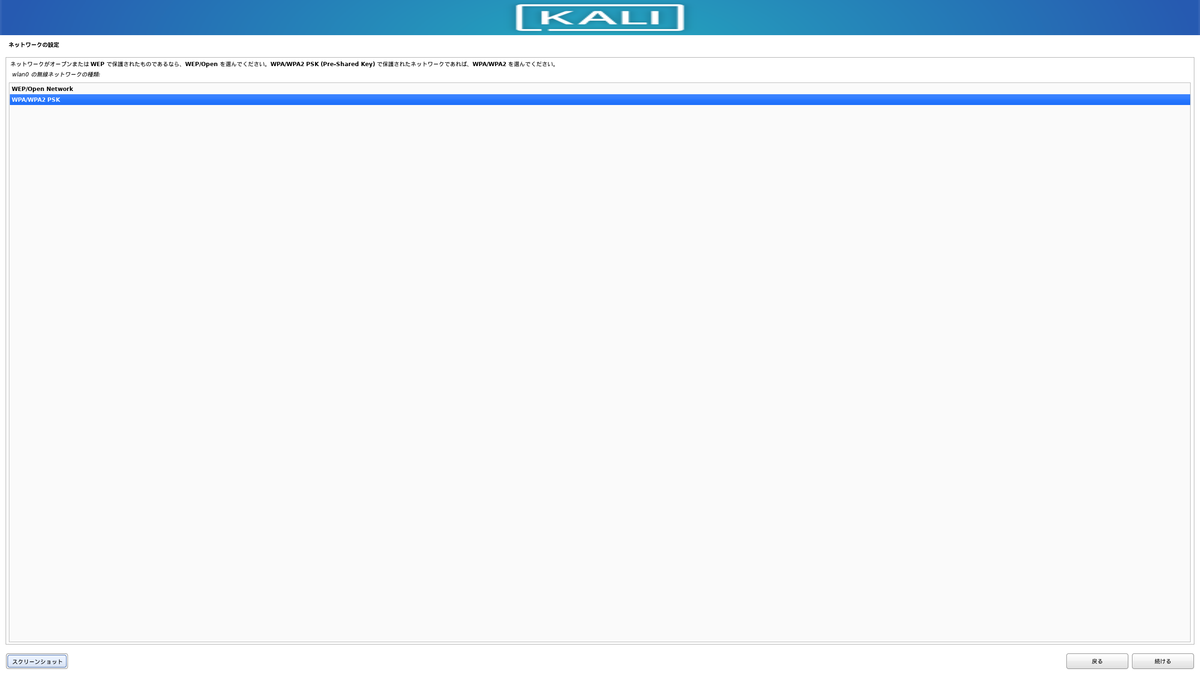
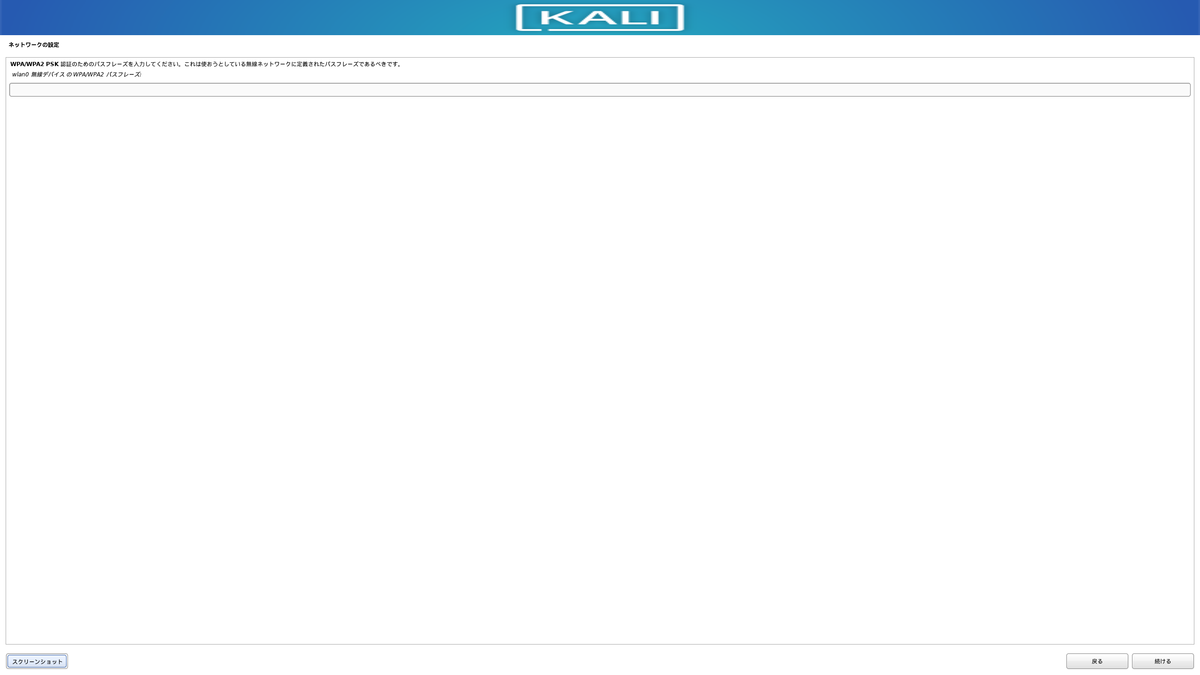
ネットへの接続設定
この場は無線接続で設定をした方がインストールがうまく行きます。

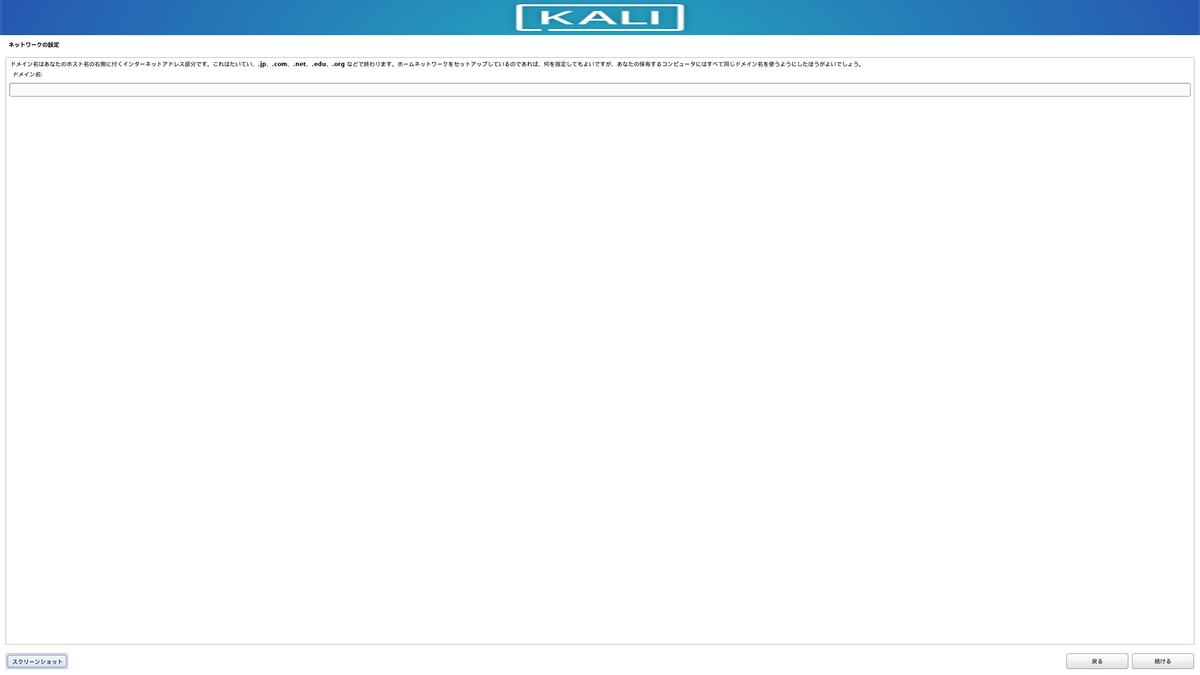
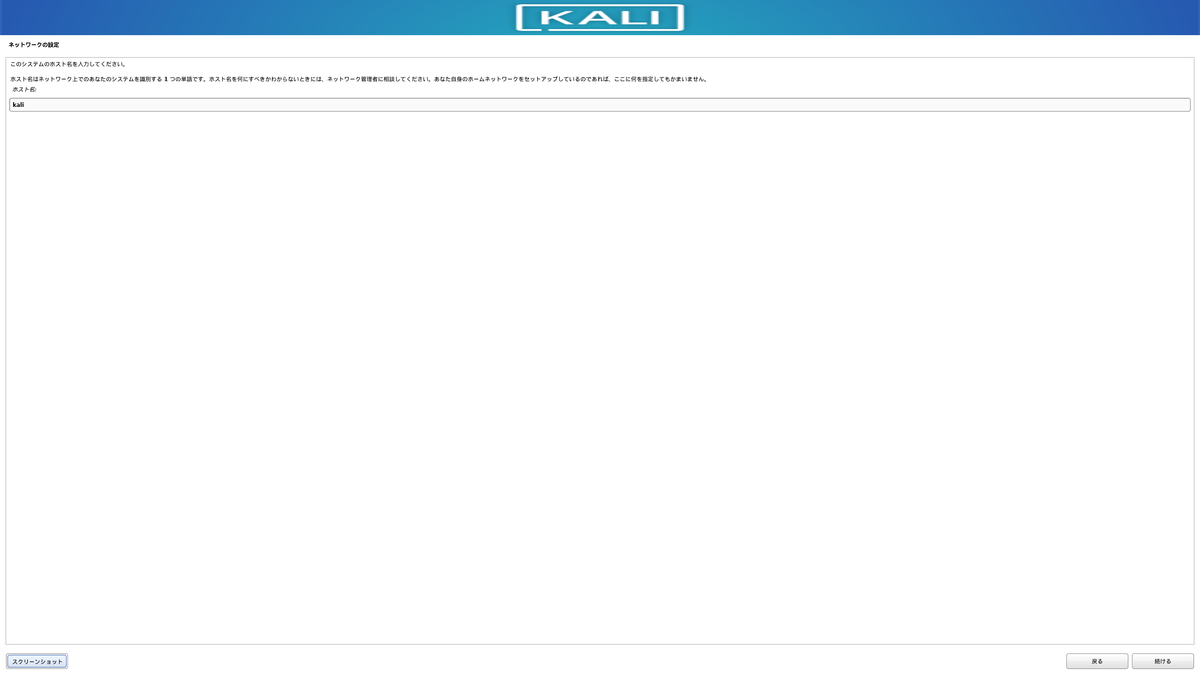
ドメインの設定
未設定でも大丈夫そうです。
ユーザ情報の設定
起動時のログインやsudoコマンドの実行に必要なのでしっかり覚えておく。


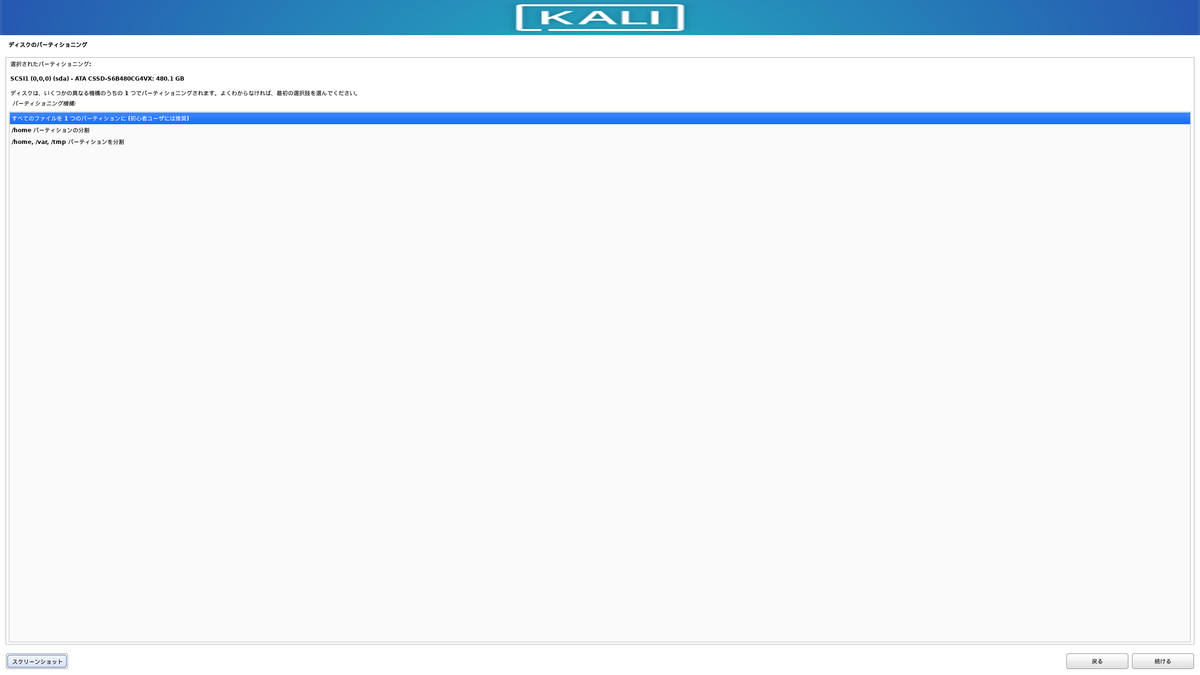
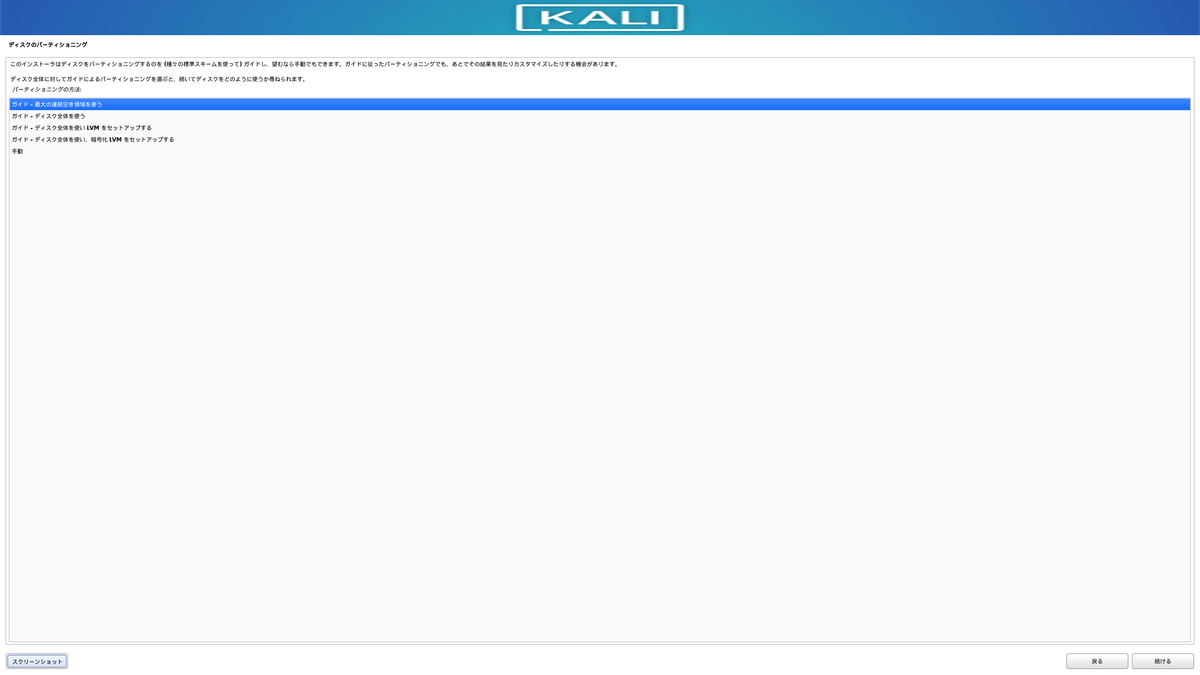
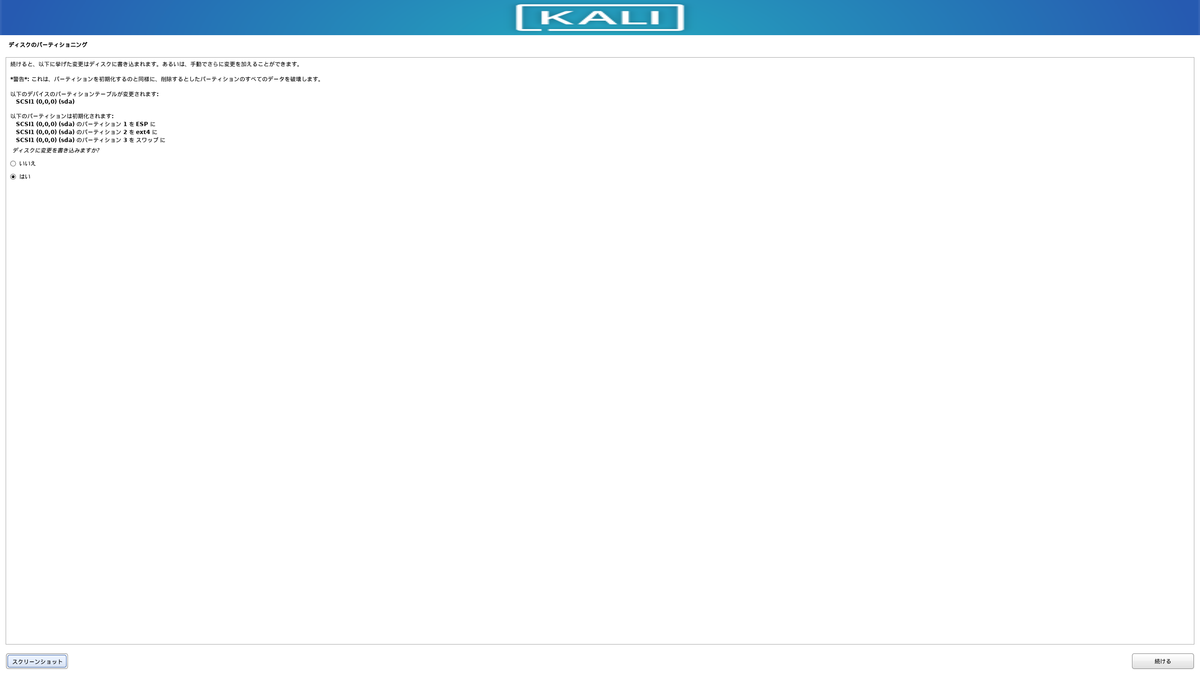
ディスクパーティションの設定
デフォルトの選択肢でそのまま進めば大丈夫そう。

設定を適用するために変更します。
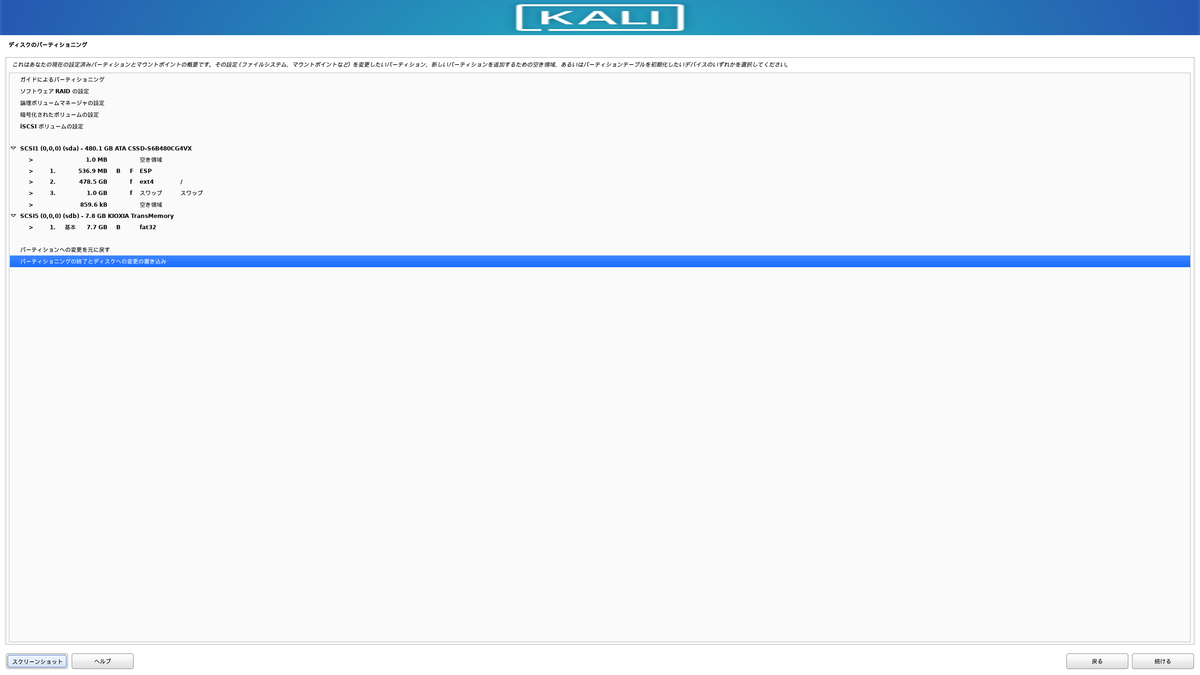
デフォルトが「いいえ」になっているので、「はい」を選択。
ソフトウェアのインストール
下のおすすめソフトも入れたほうがいいと思いますが、インストールが失敗となった場合はチェックを外して、デスクトップ用にXfceだけをチェックするとインストールが成功します。
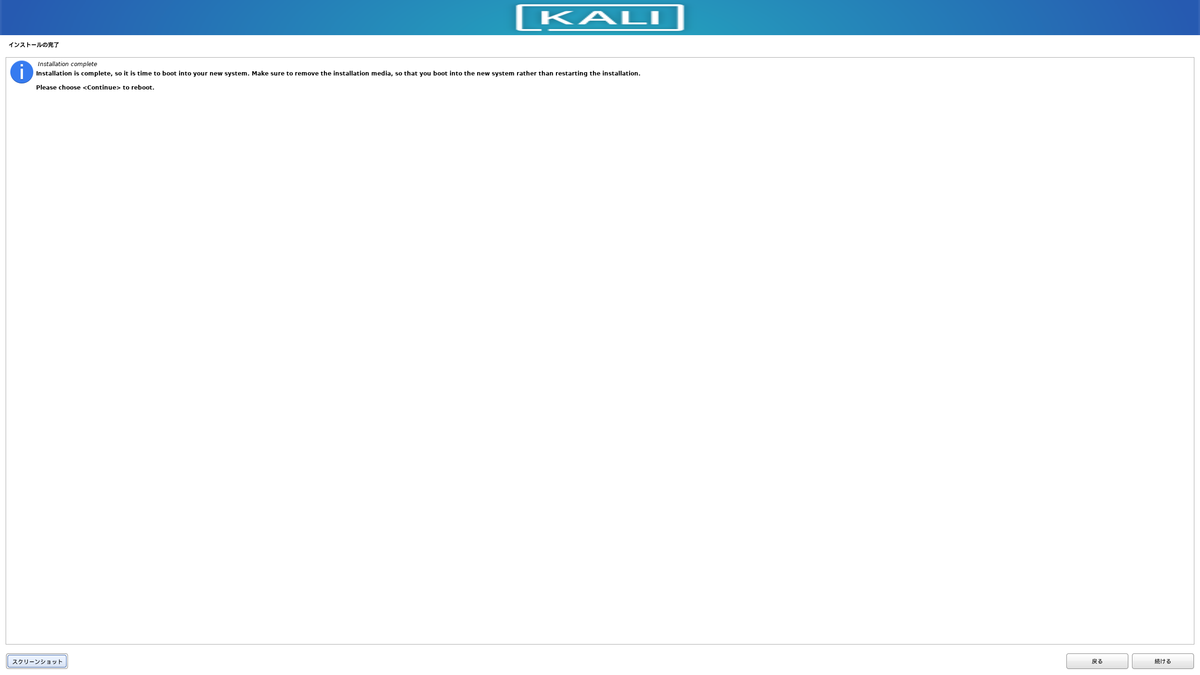
これでKali Linuxのインストール完了です。
Rebootするとログイン画面が表示されます。

ログイン
ユーザ情報設定の際に入力したユーザ名とパスワードを入力するとログインできる。

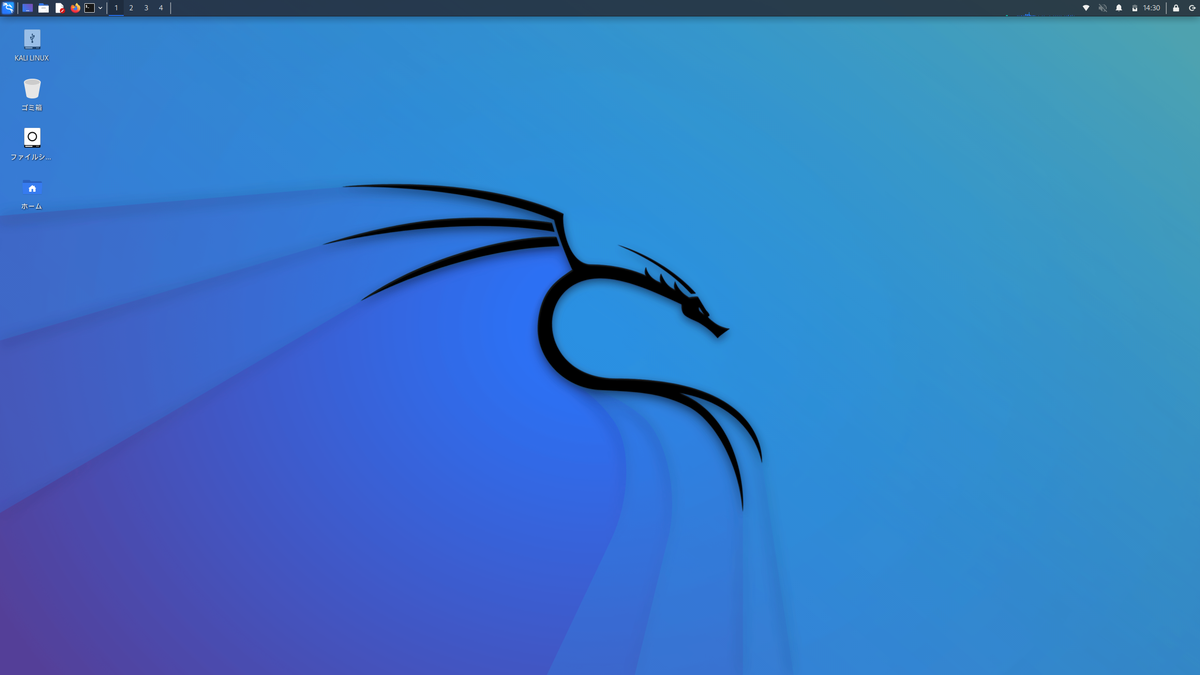
🎉
日本語入力
デフォルトの状態では、日本語入力を受け付けてくれないので対応します。
ターミナルを起動して、
sudo apt install -y task-japanese task-japanese-desktop
を実行。
再起動すればいつもどおりの「半角/全角」で入力できるようになります。
おまけ(上手くいかなかったこと)
相当な回数失敗して土日を2週間分近く浪費しました。。。
USBを挿すポートで失敗(USB3.0とUSB2.0)
Rufusを使ってインストール用USBメモリを作成するところで失敗しました。
原因は、上記でも触れているようにUSB2.0ポートを使用していたことです。
これに気づかずに、何度もtorrentファイルからisoファイルをダウンロードしなおして試してみたり、RecommendedではなくてNetInstallerのisoファイルを試してみたりと、いろいろ試行錯誤しました。
まさか、USB2.0と3.0でこんなに違うとは思わなかった。
今後はちゃんと意識した方が良さそうです。(3.0があるのに思考停止で2.0に挿していたのも考え物だ)
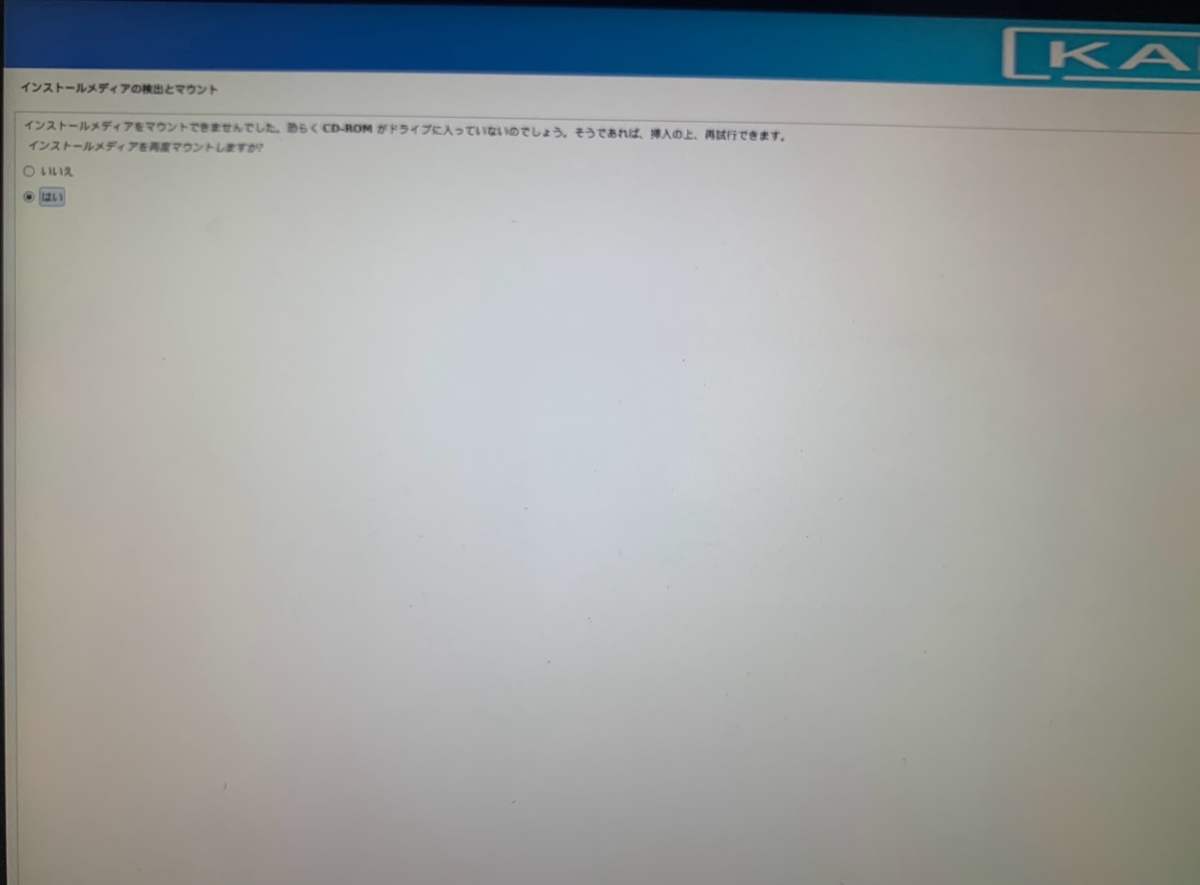
CD-ROMドライブが見つからない
原因は不明のままですが、こちらのおかげでなんとかなりました。
これが表示されたら、USBを一旦外して再度挿して、USBがピカピカ光ったのを確認してから「はい」をこの画面で選択して進めると、今度はインストールメディアをマウントできます。
ネットワーク設定の失敗
PCにはLANケーブルを挿していたので、初めは有線(eth0)を選択したのですがうまくいきませんでした。
無線(wlan0)を選択し直して進めたらうまくいきました。

ソフトウェアインストールの失敗とやり直し
初め、ソフトウェアインストールのところで一度失敗し(ここまでは問題ない)、よくわからずにそのまま進めてしまったことで(ここが問題)、デスクトップ用のソフトなしでKali Linuxのインストールが完了して、全てがコマンドによる操作になってしまいました。
シャットダウンすらままならなかったので、結構大変でした。
対応は、以下の手順で行いました。
rebootコマンドで再起動
再起動時にF2キー連打でBIOS画面を表示させる
起動デバイスの優先順位を変更(間違ったインストールとなったKali Linuxを起動させない)
言語の設定からやり直す
ソフトウェアのインストールは上述のようにおすすめソフトなどのチェックを外してデスクトップソフトはチェックする
※1点注意が必要なのはデバイスパーティションの設定で、すでに間違ったKali Linuxのインストールでディスクが使用されているので、この画面ではディスク全体を選択すること。


参考
【Aurora MySQL】日本語対応
概要
AWS RDSでAurora MySQLを選択してデータベースを作成した。
Railsとかでmigration実行をしてテーブルも作成した後、データ挿入を行うと日本語が全て???で保存されていた。
ちゃんと日本語で保存されるように頑張る。
具体的には、AWSのコンソールでパラメータグループを作成するのと、mysqldumpで作成済のデータベースやテーブルのエンコードを再設定する。
元の状態
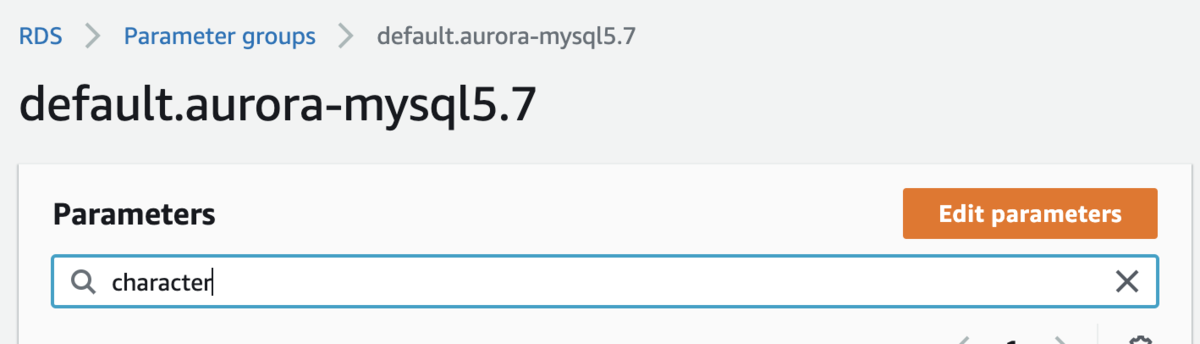
パラメータ
Aurora MySQLはデフォルトでパラメータが以下のように設定される。
show variables like '%char%';
- character_set_client: utf8
- character_set_connection: utf8
- character_set_database: latin1
- character_set_filesystem: binary
- character_set_results: utf8
- character_set_server: latin1
- character_set_system: utf8
latin1なので日本語に対応できずに???となってしまう。
今回はパラメータグループの設定によって、filesystem以外をutf8mb4に変更する。(mb4は絵文字とかにも対応できる)
作成済テーブルのエンコード
show create database {データベース名}
show create table {テーブル名}
出力される情報の末尾に、DEFAULT CHARACTER SET latin1と表示される。
今回はデータベースを削除して再作成することで、DEFAULT CHARACTER SET utfmb4となるように変更する。
パラメータグループの作成と設定
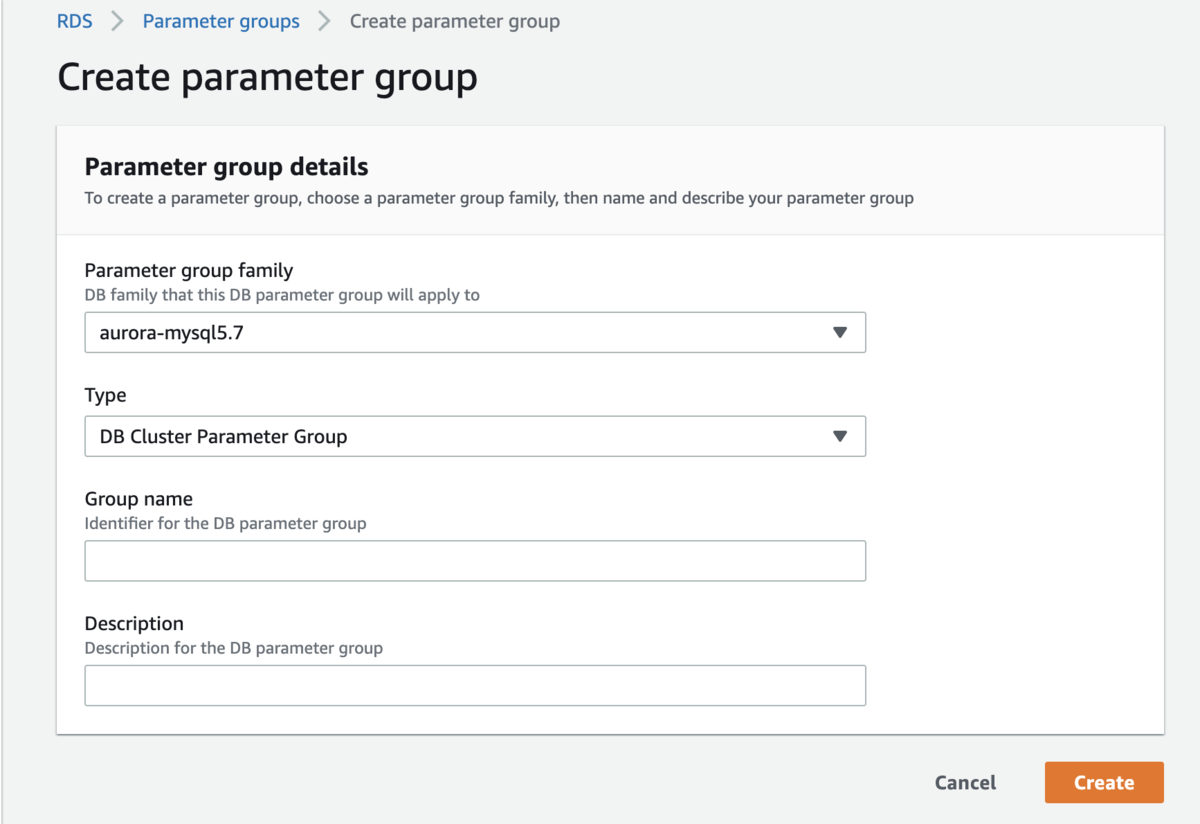
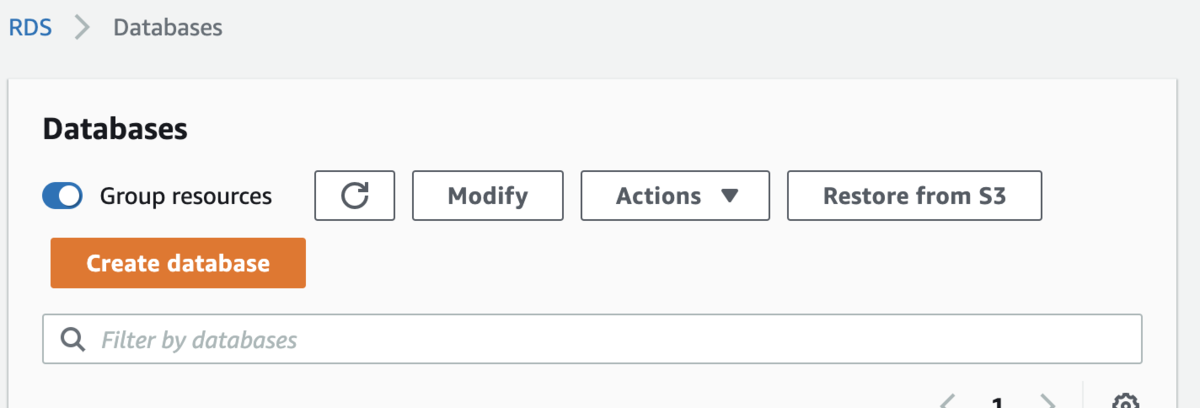
コンソールから「Create paramter group」で作成

- Parameter group family: aurora-mysql5.7(各自のDBに合わせる)を選択
- Type: DB Cluster Parameter Groupを選択
作成したパラメータグループを「Edit parameters」で編集する。
編集後は「Save changes」で保存。
- character_set_client: utf8mb4
- character_set_connection: utf8mb4
- character_set_database: utf8mb4
- character_set_results: utf8mb4
- character_set_server: utf8mb4
- collation_connection: utf8mb4_bin
- collation_server: utf8mb4_bin
- skip-character-set-client-handshake: 1
作成したパラメータグループを設定するためDBクラスターを「Modify」で編集。
Additional configuration > Database options > DB cluster parameter groupで作成したパラメータグループを選択。
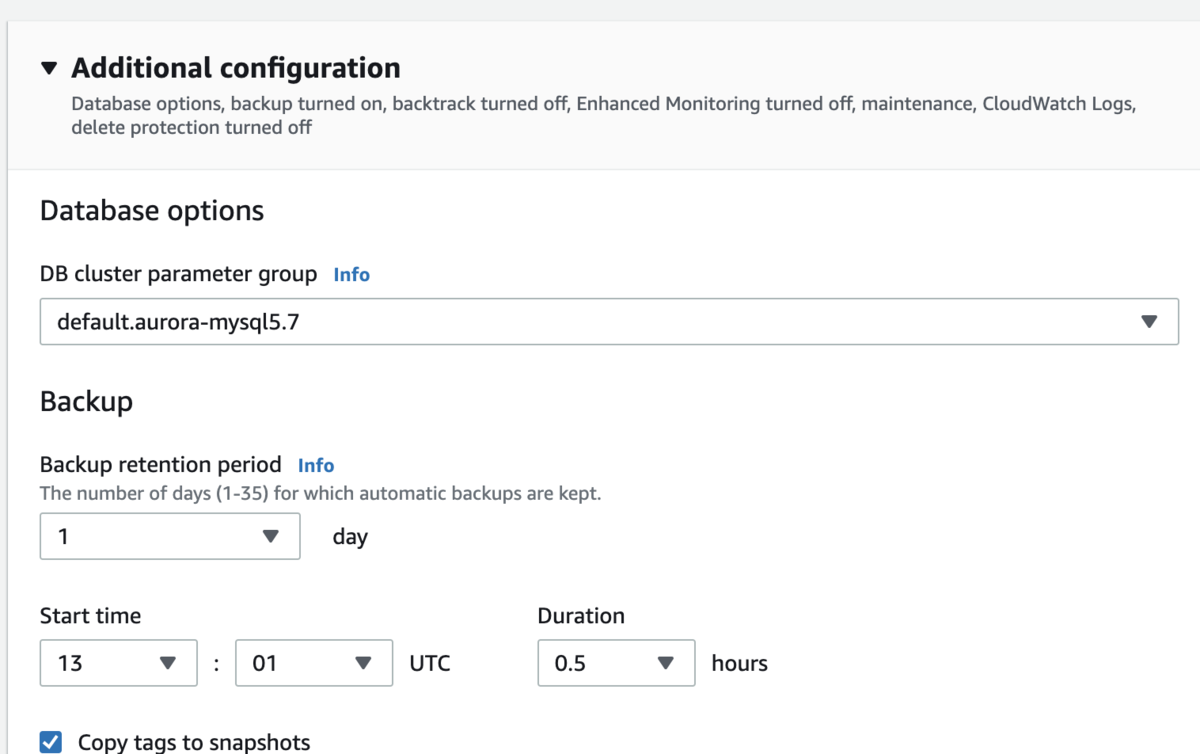
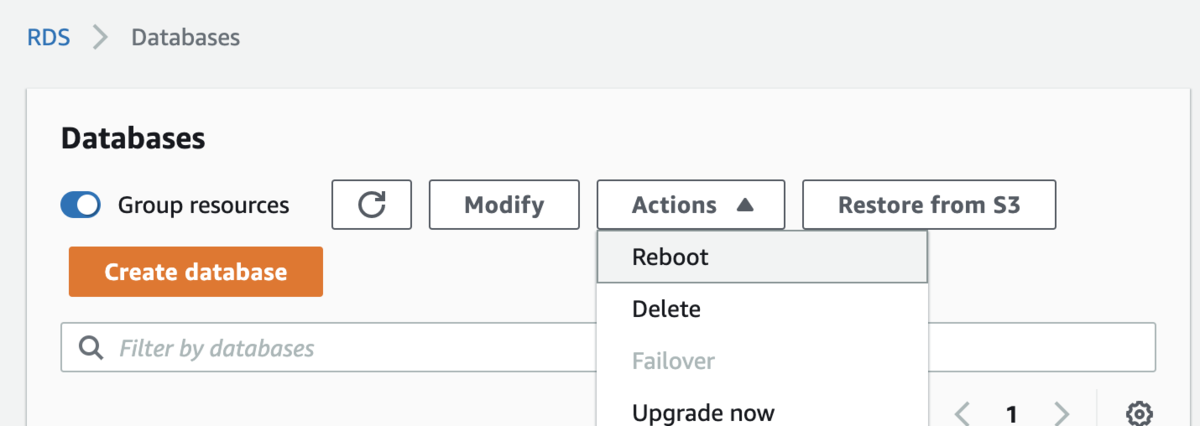
設定後にDBクラスターに所属するDBインスタンスを「Reboot」して設定を反映。
これで、以後作成されるデータベースとテーブルは大丈夫。
作成済のデータベースとテーブルのエンコードを変更
DBの踏み台にしているEC2インスタンスへssh接続したのち、mysqldumpを実行。
mysqldump -u {USER_NAME} -p -h {HOST_NAME} {DB_NAME} > {OUTPUT_FILE_NAME}
出力された.sqlファイルを編集したいが、編集作業はローカルの方が楽なのでローカルへコピーする。
scp -i {鍵ファイル} {ec2-user}@xxx.xxx.xxx.xxx:{OUTPUT_FILE_NAME} ./
OUTPUT_FILEのlatin1とutf8となっている箇所を全てutf8mb4へ置換して、EC2インスタンスへコピーする。
scp -i {鍵ファイル} ./{OUTPUT_FILE_NAME} {ec2-user}@xxx.xxx.xxx.xxx:./
EC2インスタンスからDBへ接続し、データベースを削除する。
mysql -u {USER_NAME} -p -h {HOST_NAME}
drop database {DB_NAME};
quit;
EC2インスタンスから編集後の.sqlファイルを適用してデータベースを作成する。
mysql -u {USER_NAME} -p -h {HOST_NAME} {DB_NAME} < {OUTPUT_FILE_NAME}
これで完了。
おしまい
データベースのエンコードとかタイムゾーンみたいなパラメータの設定は、データベース作成前にきちんとやっておくといい。
後からやるとデータベースを再作成しないといけないから面倒。